
Okta Integration with Apple Business Manager and Apple School Manager
Introduction
Apple Business Manager is a web-based portal that helps you deploy iPhone, iPad, Mac, and Apple TV. And you can easily provide employees with access to Apple services, set up device enrollment, and distribute apps, books, and software — all from one place.
In Apple Business Manager, you can now link Okta (your Identity Provider) to allow users to sign in to Apple devices with their Okta username and password.
As a result, your users can leverage their Okta usernames and passwords as
Managed Apple IDs.
They can then use those credentials to sign in to their assigned iPhone, iPad, or Mac and even to iCloud on the web.
This blog shows a step by step guide on how to integrate Okta with the Apple Business Manager this integration was announced at Apple’s Worldwide Developers Conference WWDC 2023.
Okta is now a supported IdP for authenticating and provisioning Managed Apple IDs within Apple Business/School Manager.
Requirements
Ensure that you meet these requirements before starting the configuration steps on Apple side:
- Apple Business Manager Account
– Verified organization with D-U-N-S Number
– Verified company domain – Apple Guide
Ensure that you meet these requirements before starting the configuration steps on Okta side:
- Okta Identity Engine (OIE)
- Okta Admin Console Access
- Okta Feature Flag enabled ( is available in Early Access from mid-May 2024)
Here you’ll find the official Okta docs for ABM Integration.
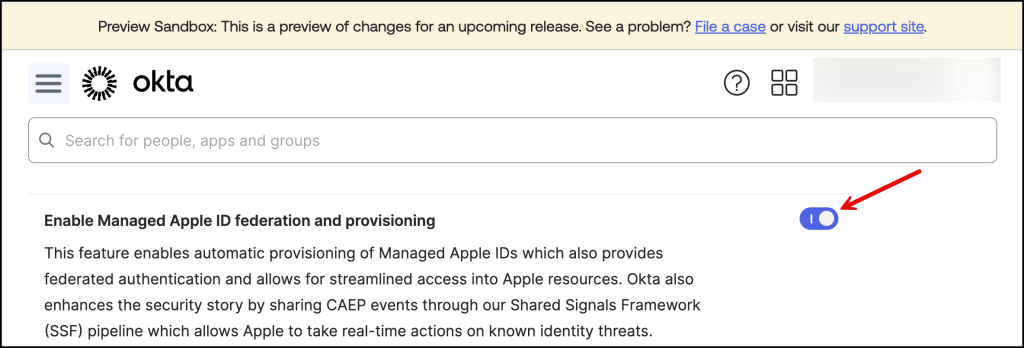
Enable Early Access Feature
In the Okta Admin Console navigate to Settings –> Features
And Enable Managed Apple ID federation and provisioning
Apple – Set up Federated Authentication
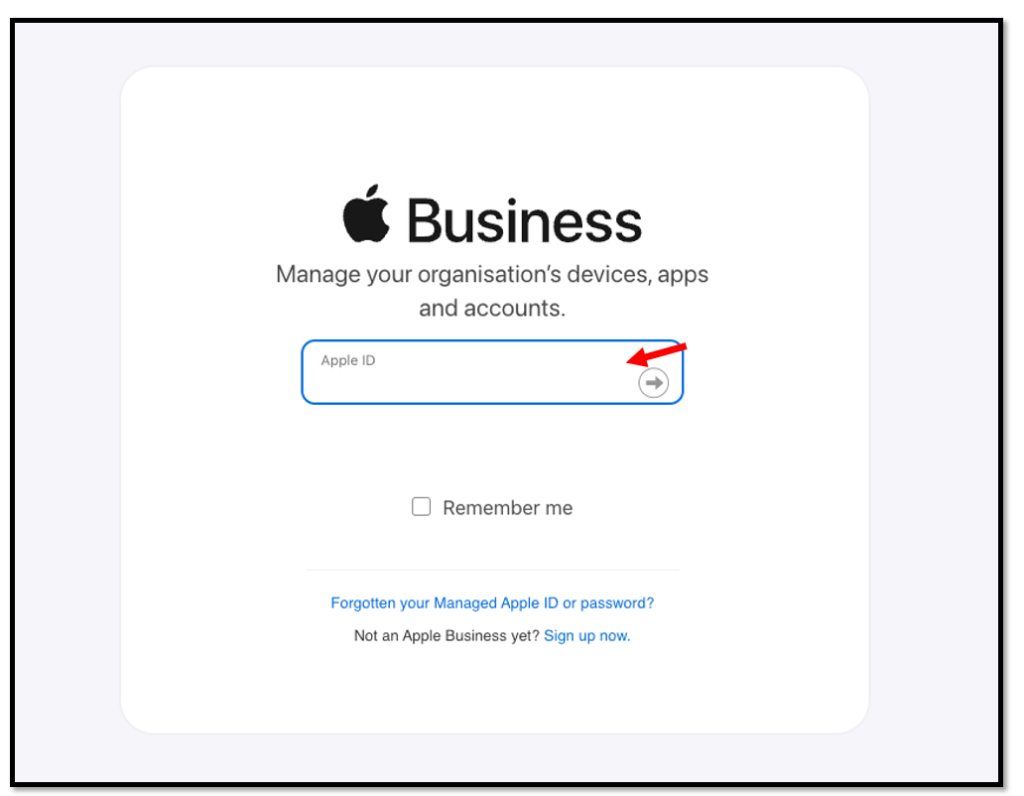
Log in to your Apple Business Manager
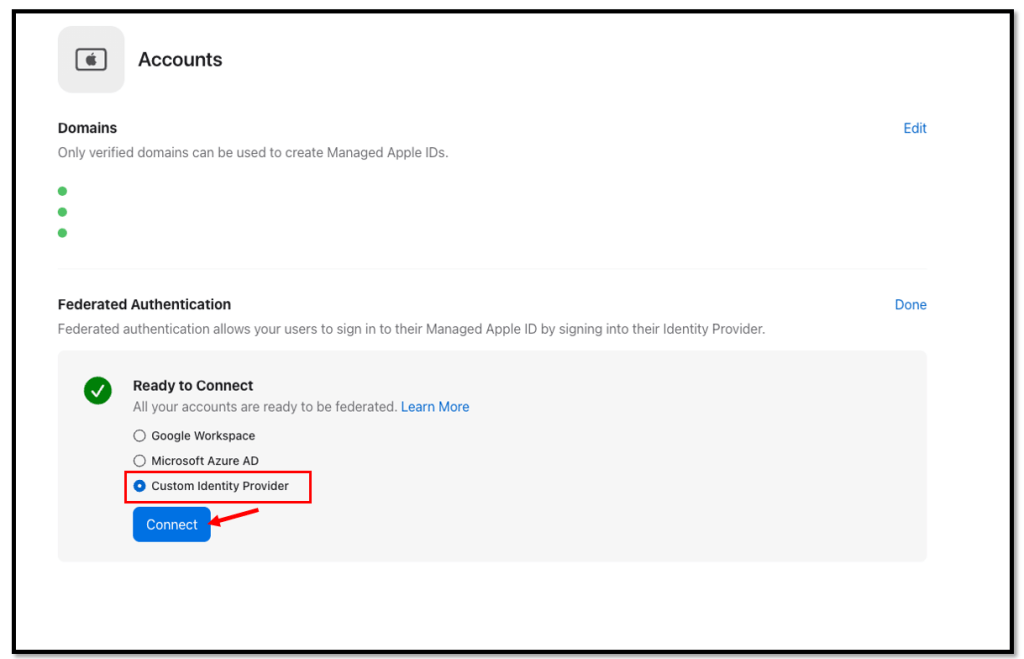
Within your Apple Business Manager console, navigate to Preferences
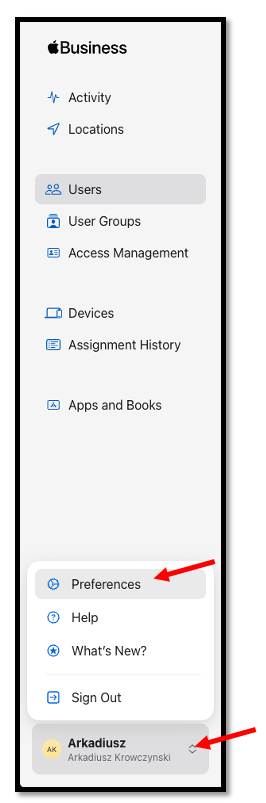
and Accounts
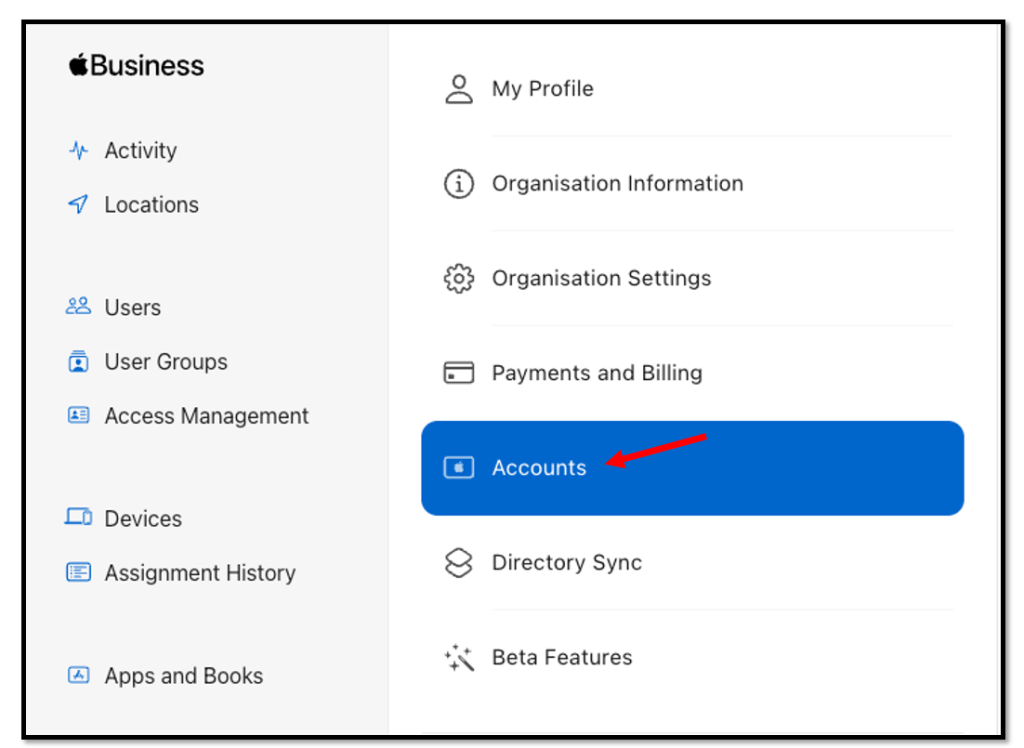
Within the Accounts Section click the Edit button
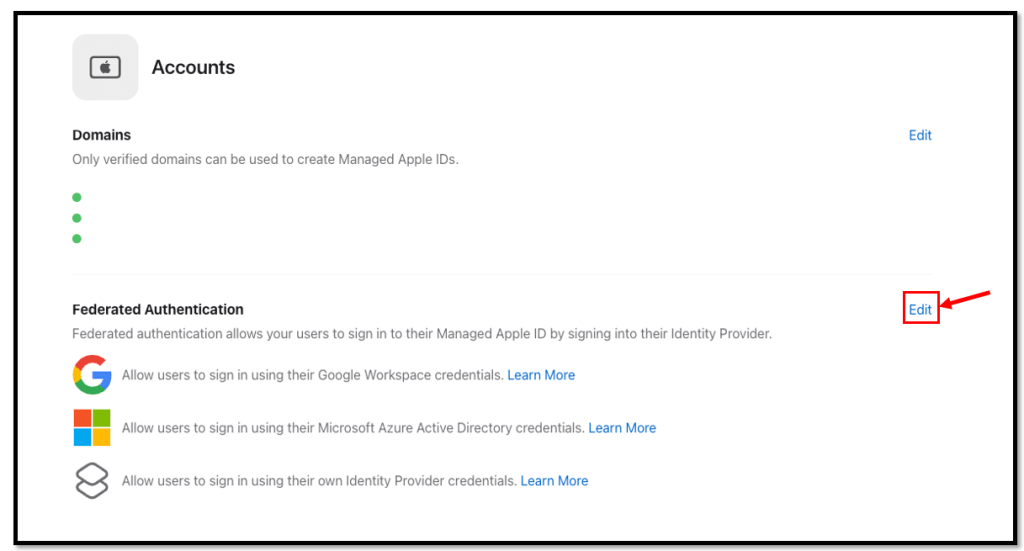
Select Customer Identity Provider and click Connect
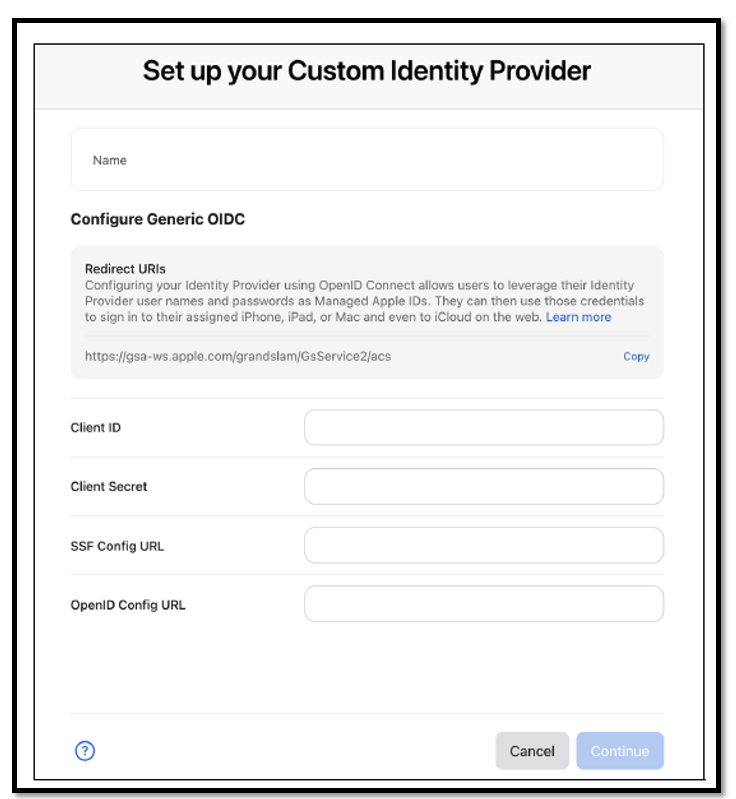
You should see the following screen, leave it open and now navigate to your
Okta admin console to create the first App Integration.
In the Okta Admin console navigate to Applications–> Applications

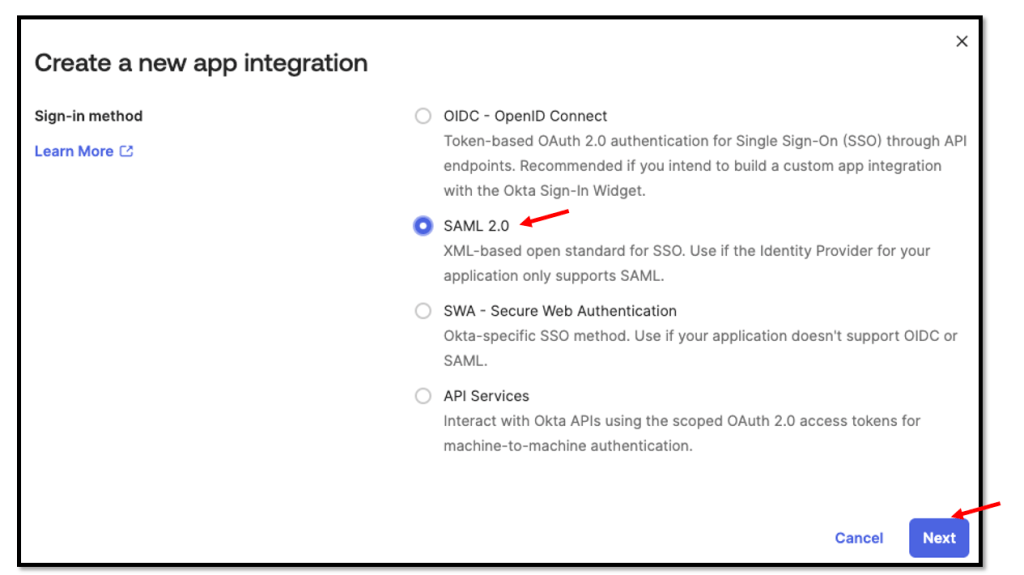
and create the following App Integration OIDC Sign-in method –> Web Application

Configure the app with the following values:
###
App Integration name: Apple Business Manager OIDC
Grant type: Authorization Code & Refresh Token
Sign-in redirect URIs: https://gsa-ws.apple.com/grandslam/GsService2/acs
(Obtained from the Apple Set up your Custom Identity Provider page)
###

Skip group assignment for now and Save the App Configuration.

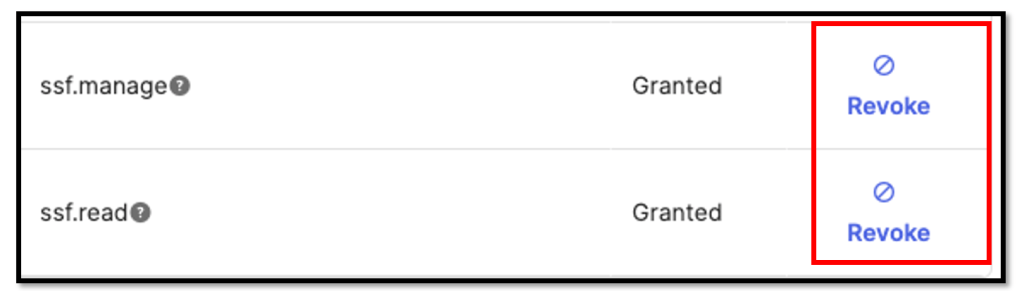
Now navigate to the Okta API Scopes menu
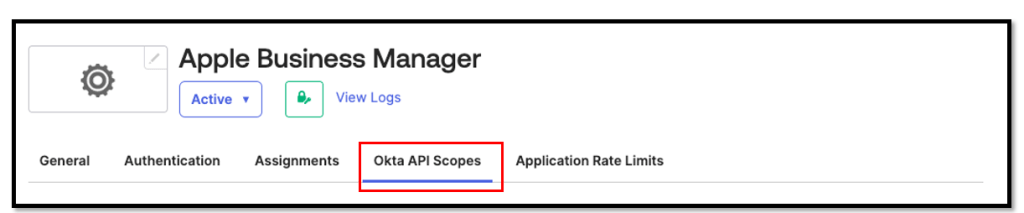
and grant the ssf.manage & ssf.read scopes
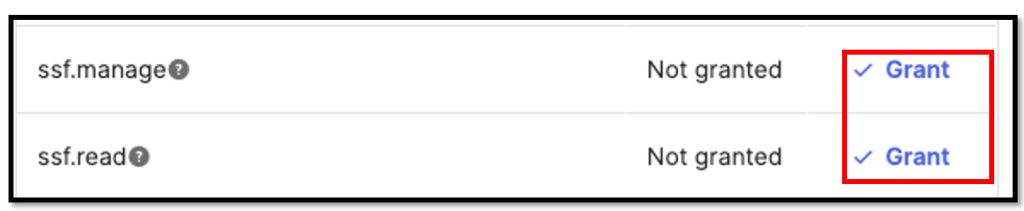
The API scopes should then look like this
The first part in the Okta admin console is done, now it’s time to switch back to the
Apple Business Manager console and continue the setup there.
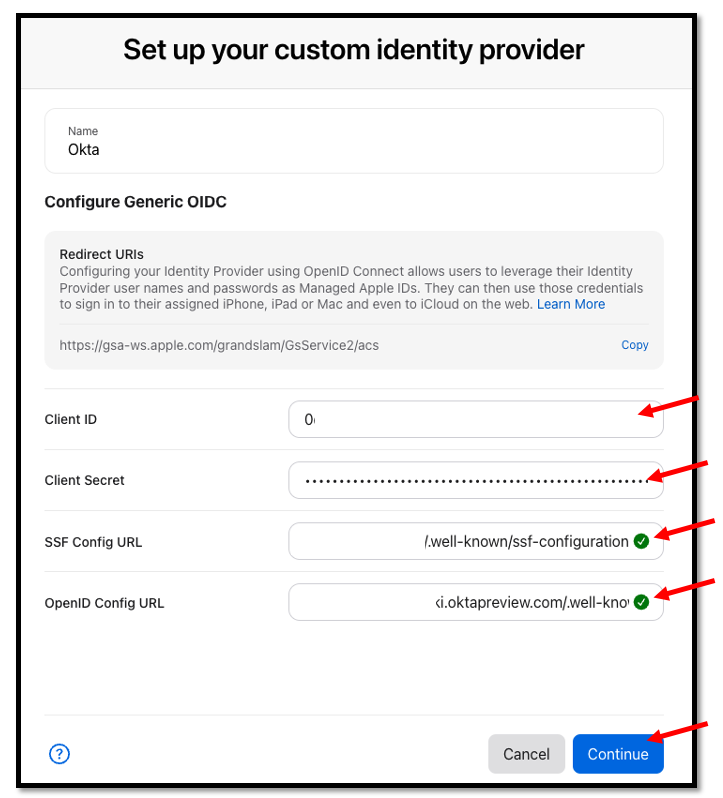
We need the following values for the Apple configuration:
Name: Okta
Client ID: Obtain from Okta OIDC application – Client Credentials → Client ID
Client Secret: Obtain from Okta OIDC application – Client Secrets
SSF Config URL: https://<OktaOrgURL>/.well-known/ssf-configuration
OpenID Config URL: https://<OktaOrgURL>/.well-known/openid-configuration
Once you enter all of the necessary configurations details, select Continue within the
App Console.
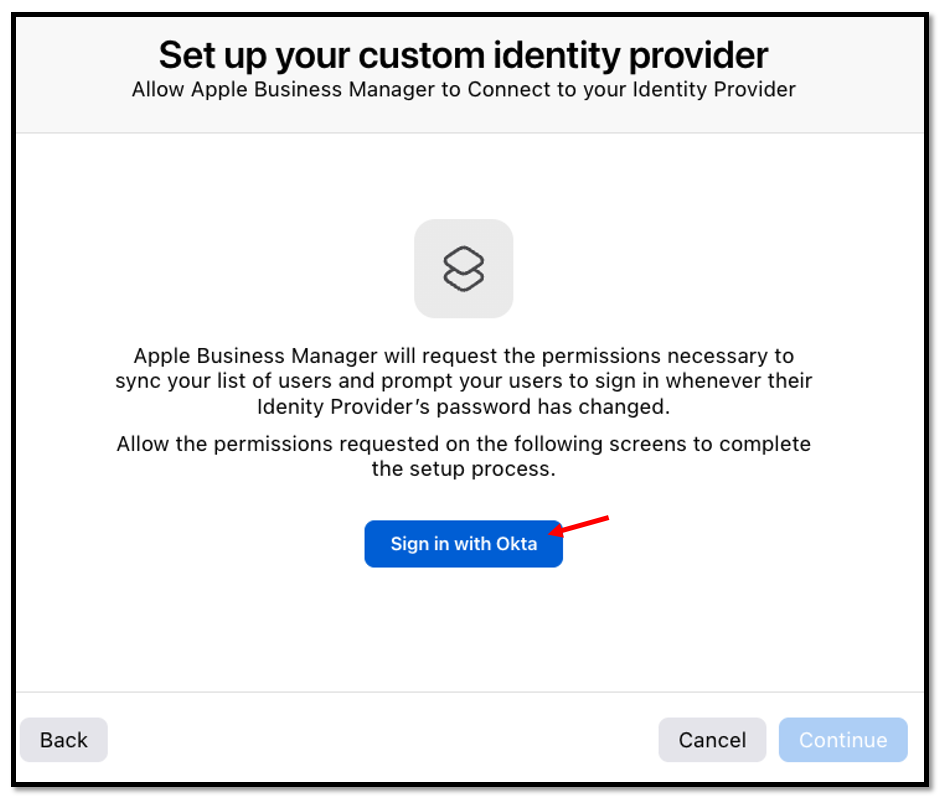
You will be presented with an Okta login page to successfully connect your
Okta & Apple configuration.
Please press Sign in with Okta here
Enter the necessary credentials
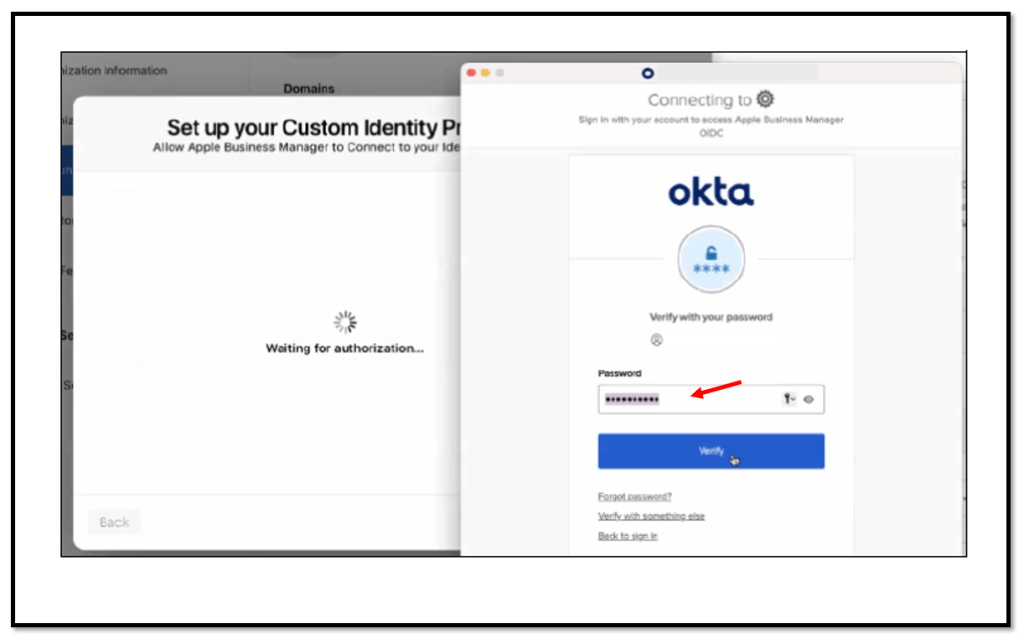
and if all went fine, you are good to continue.

Set up Directory Sync between Okta & Apple
Within most of these steps, you will need both your Apple Business Manager console and Okta admin console open in different tabs to copy/paste data between both configurations.
In your Okta admin console, browse to:
Applications → Applications → Create App Integration → SAML 2.0
Enter a App name e.g. Apple Business Manager SCIM

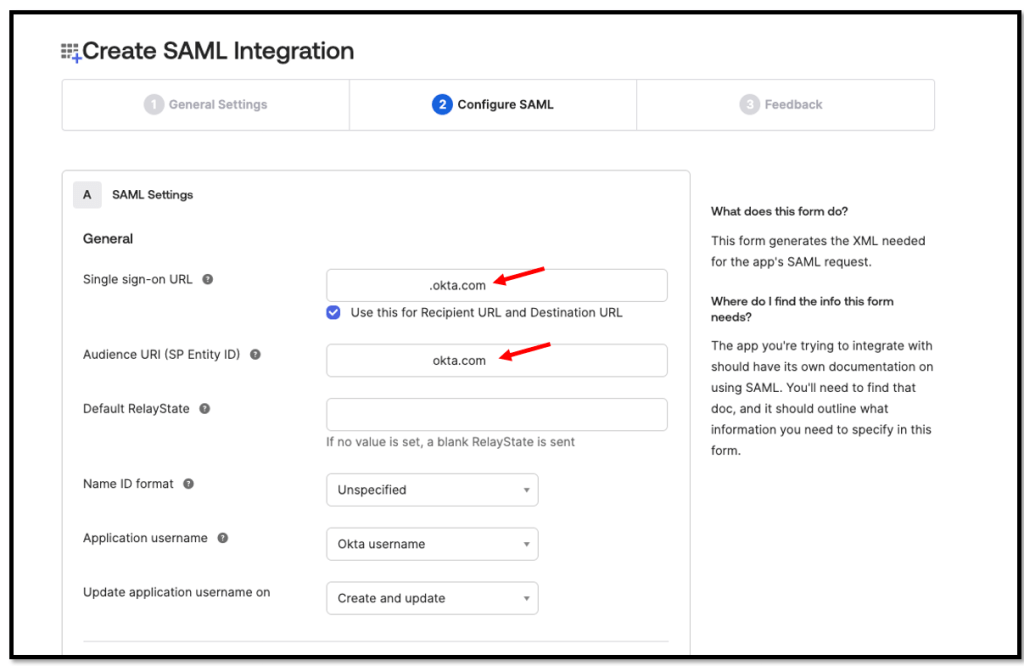
Configure the application with the following values and save your settings.
Single sign-on URL: https://<YOUR-OktaOrgUrl>
Audience URI (SP Entity ID): https://<YOUR-OktaOrgUrl>
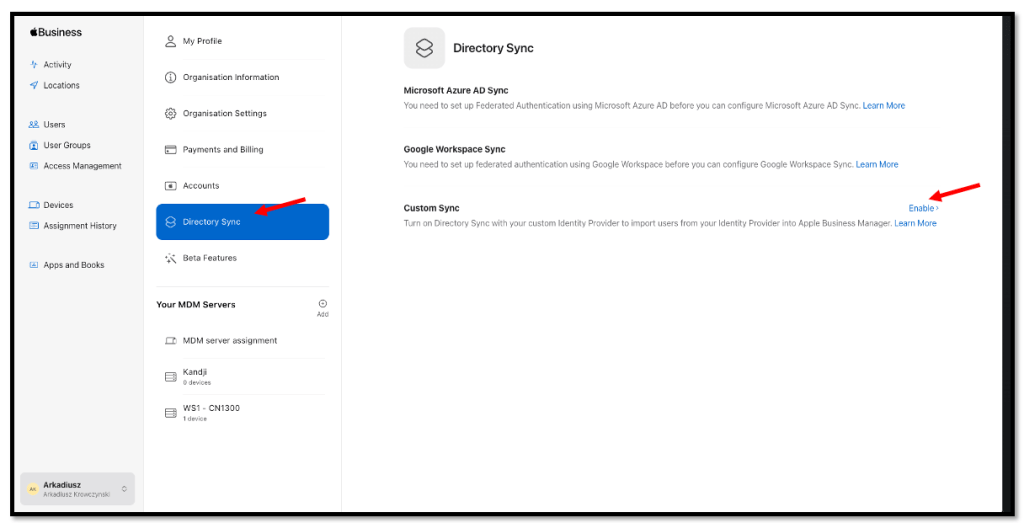
Within your Apple Business Manager console, navigate to:
Preferences → Accounts → Directory Sync → Okta (Custom) Sync and Enable it.
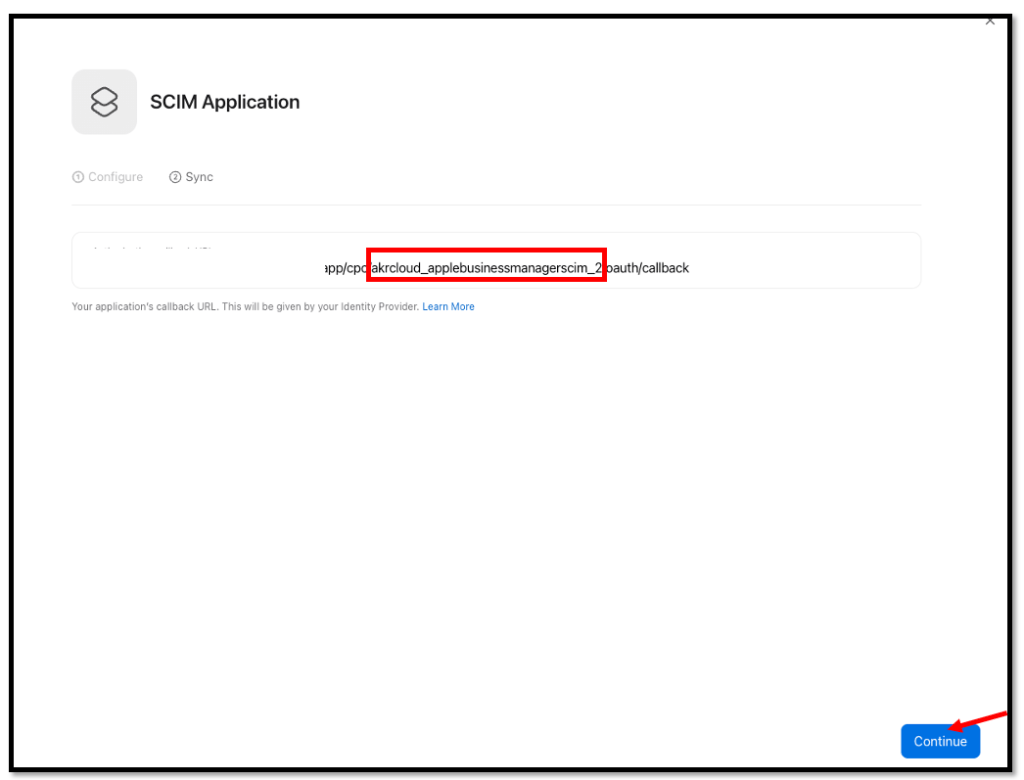
For the Authorization callback URL enter:
https://system-admin.okta.com/admin/app/cpc/<SAML_AppBundleName>/oauth/callback
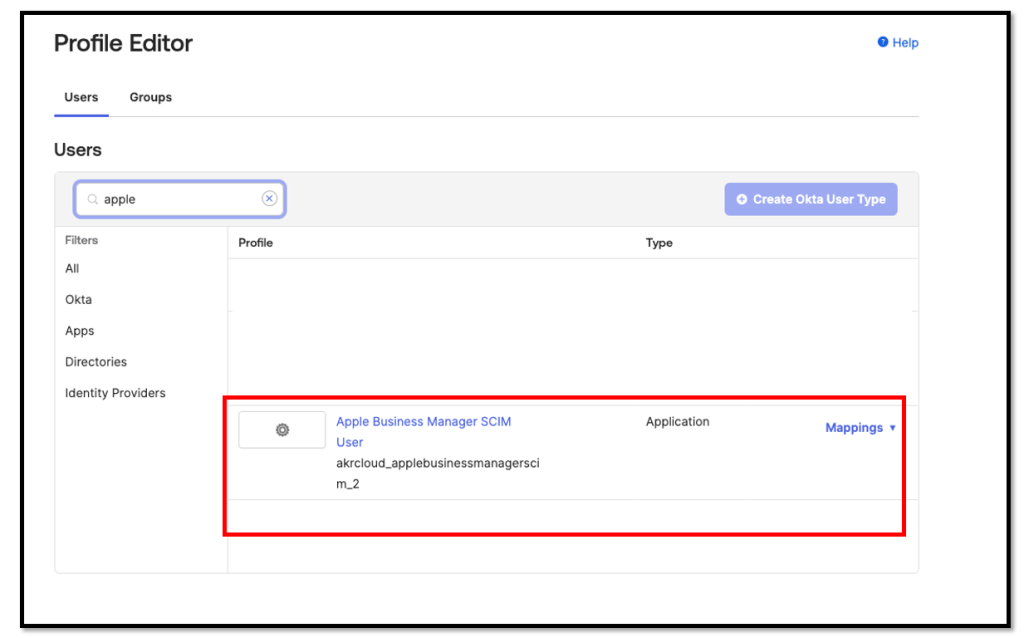
To obtain your SAML App Name, browse to Directory → Profile Editor

Look for the SAML application you created in the previous step.
Typical it looks like <OrgURL_appName>, here is my example
Once you paste your callback URL into the Apple Business Manager console, click continue to access additional configuration details

Now we will need to complete the SCIM configuration within the Okta admin console.
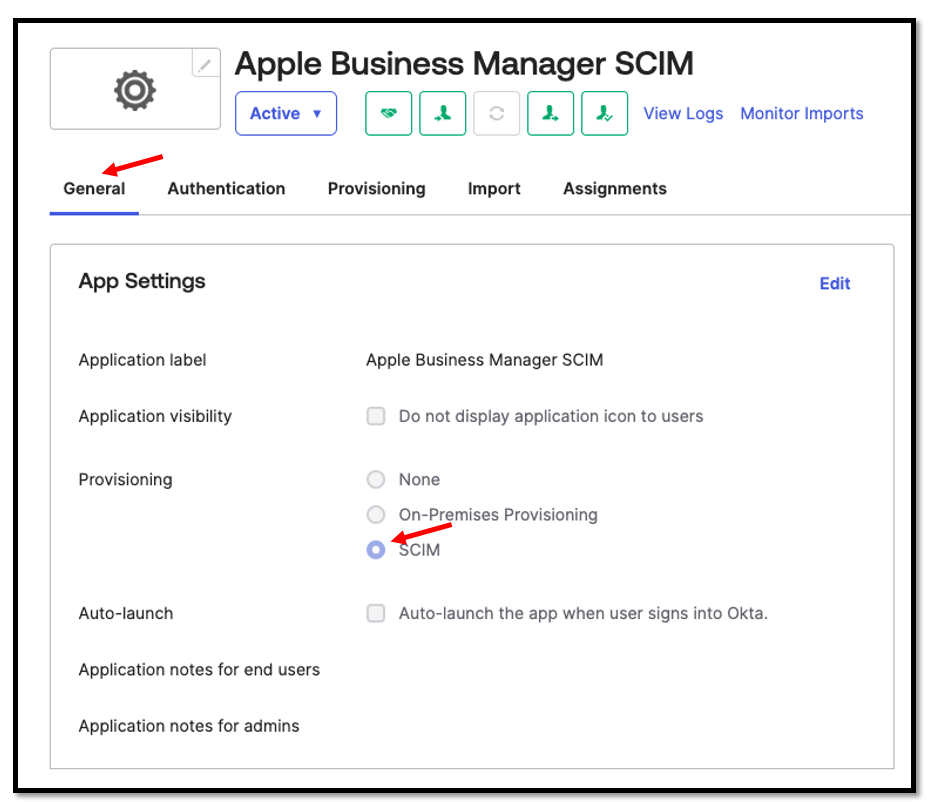
To configure this we need to open the SAML application and navigate to the the
General tab –> App Settings –> Provisioning section and select SCIM.
Once this has been activated, we go to the Provisioning tab, here most values will be obtained from the SCIM Application within the Apple configuration.
SCIM connector base URL: https://federation.apple.com/feeds/business/scim
Unique identifier field for users: userName
Supported provisioning actions: Import New Users and Profile Updates, Push New Users,
Push Profile Updates
Authentication Mode: OAuth 2
Access token endpoint URI: https://appleid.apple.com/auth/oauth2/v2/token
Authorization endpoint URI: https://appleid.apple.com/auth/oauth2/v2/authorize
Client ID: Copied from Apple
Client Secret: Copied from Apple

To get all this values switch to your Apple Business Manager Console and navigate again to
Preferences → Accounts → Directory Sync → Okta (Custom) Sync
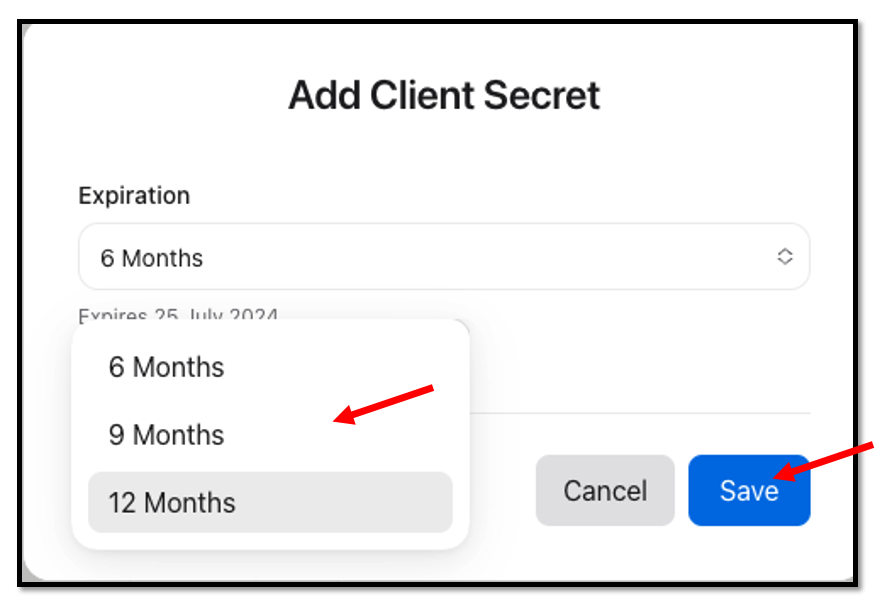
The Client ID is already in place, now we need to create a Client Secret, to do so press the blue Client Secret button.

Select your Expiration value and press Save.
After all of this information is gathered and entered, select “Done” within the
Apple Business Manager console to save the configuration.
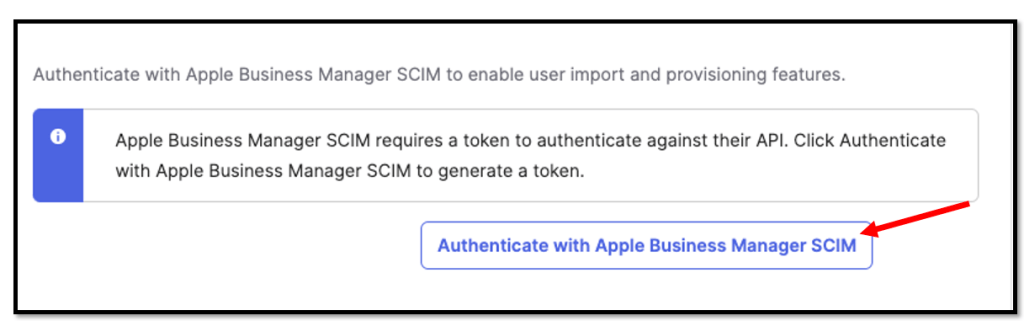
Then browse back to your Okta admin console and select
“Authenticate with Apple Business Manager SCIM” at the bottom of the
SCIM Connection page.
You should be prompted with an Apple credentials page where you will enter your
Apple Business Manager credentials to successfully connect your Apple & Okta configurations.

Select Allow here

And we should now have a valid connection in the Okta Admin Console

and the Apple Business Manager Console.

Assign any test users to this new SAML/SCIM application

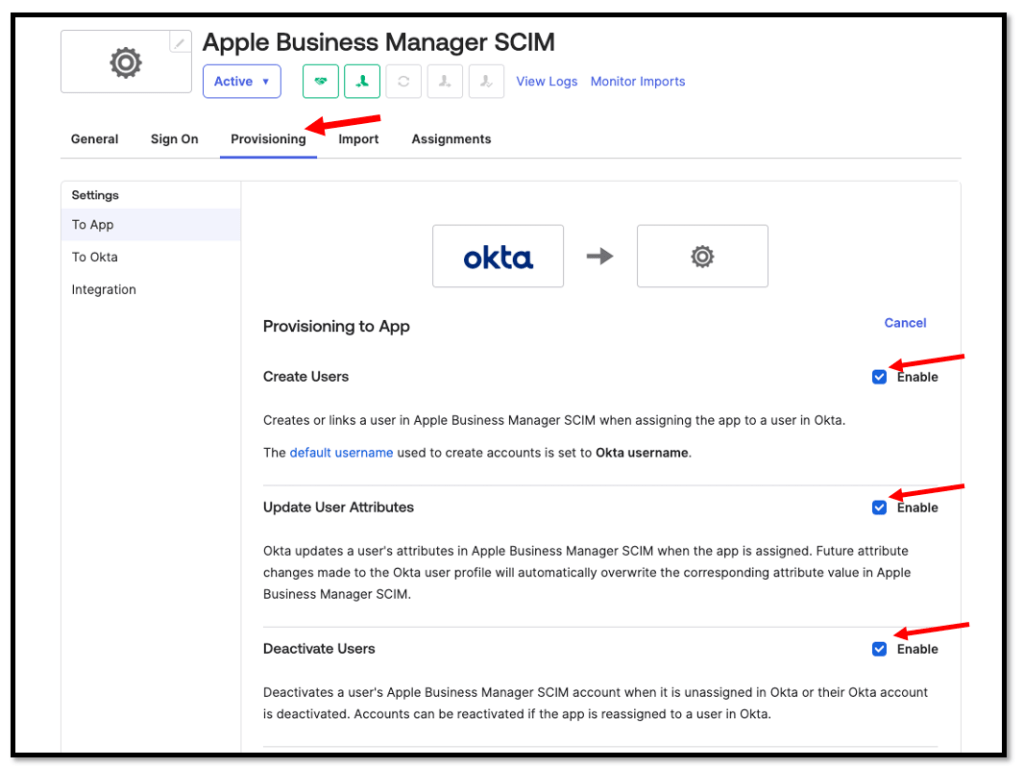
and configure the Provisioning to App Settings:
Please Enable
– Create Users
– Update User Attributes
– Deactivate Users
Within your Apple Business Manager console, navigate to:
- Preferences → Accounts → Domains
- You need to enable Federation within your verified company domain

It could take a few minutes, but all of your assigned Okta users with a matching
Email domain as the Apple verified domain will populate within your
Apple Business Manager console with a newly created “Managed Apple ID”.


Overview
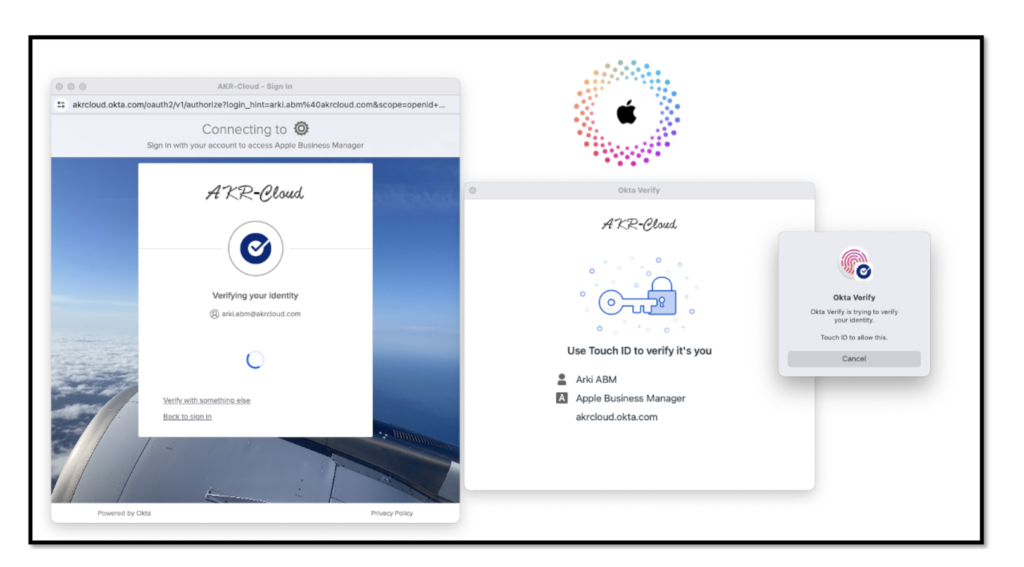
After the Okta users have been imported successfully into Apple, you can test access to Apple resources by e.g. browsing to https://appleid.apple.com and using your
Okta credentials.
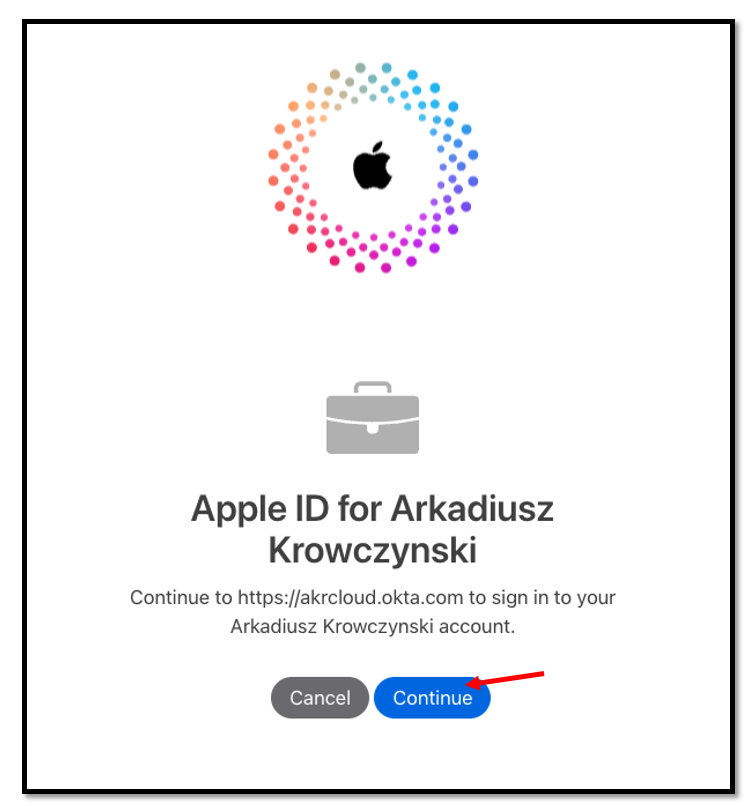
Navigate to https://appleid.apple.com/ and sign in with Okta Account

press Continue here
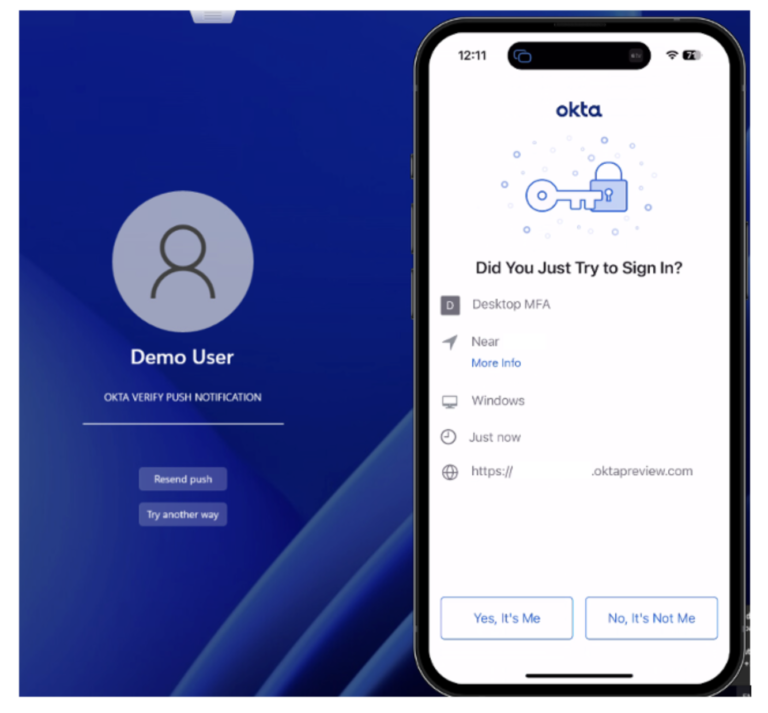
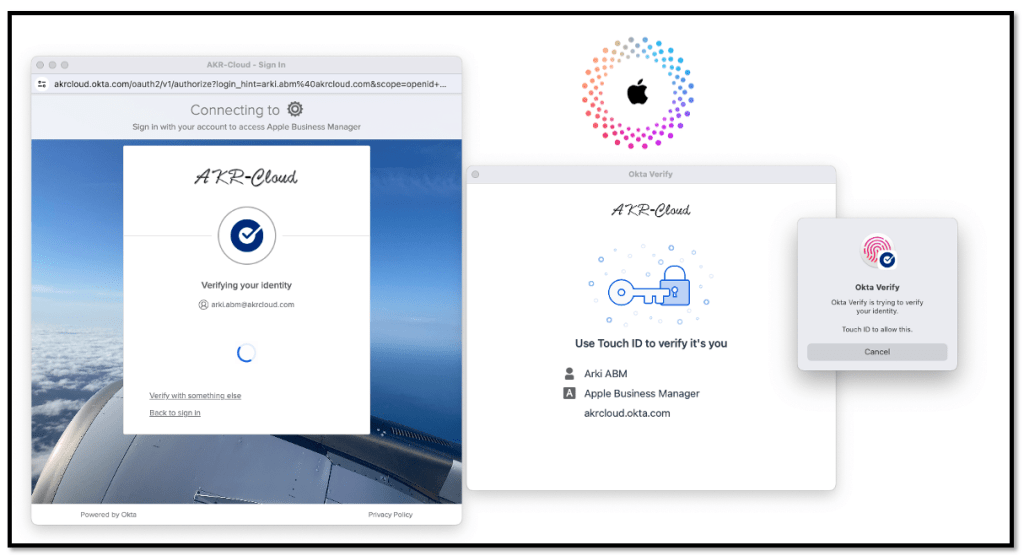
you will be redirected to Okta to authenticate, in best case for sure with a
Phishing resistant authenticator 🙂
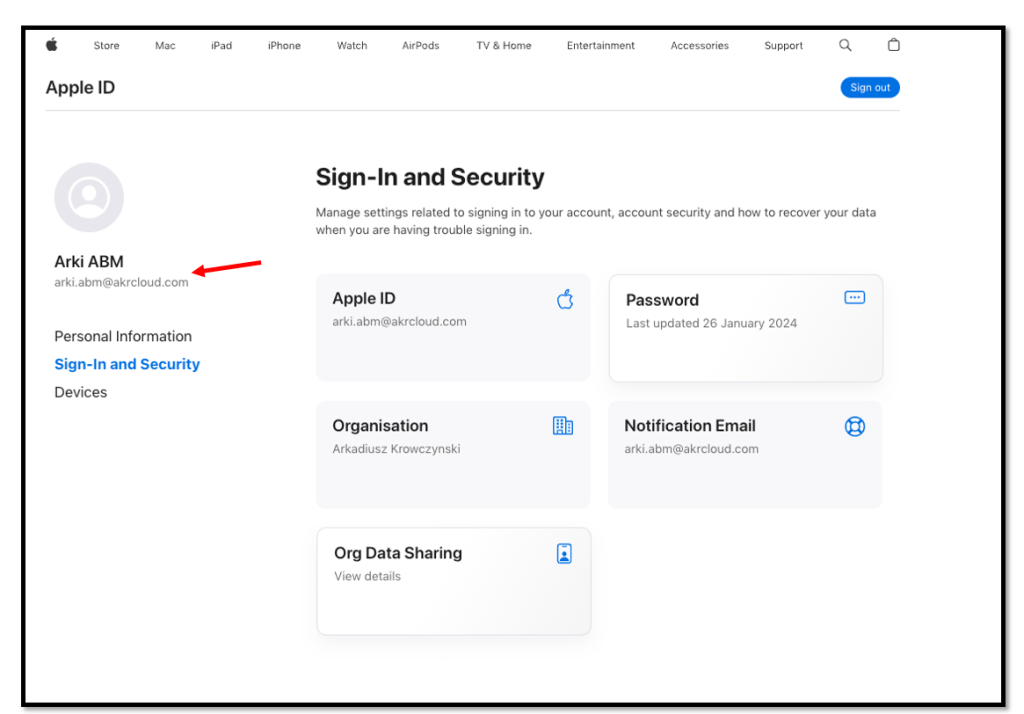
Within the Apple Portal you can managed your Apple ID account.
Demos
In the first demo I show you how a user logs in to an Apple device with his Okta credentials.
The second demo shows the login to the Apple Portal with your Okta identity.