Reinforcing the Perimeter: The Power of Device-Bound Single Sign-On
Introduction
In the modern cybersecurity landscape, the traditional perimeter has evaporated, replaced by a complex ecosystem of remote identities and distributed endpoints. As session hijacking and sophisticated phishing campaigns become the primary weapons of choice for threat actors, standard authentication methods are no longer sufficient. Enter Device-Bound Single Sign-On (SSO)—a cornerstone feature of Okta Device Access designed to anchor digital identity to physical hardware.
By moving beyond ephemeral software tokens and instead cryptographically anchoring a user’s session to the device’s own hardware security module, organizations can effectively neutralize the threat of “adversary-in-the-middle” (AiTM) attacks. This doesn’t just harden your security posture; it refines the user experience by creating a persistent, phishing-resistant environment that flows seamlessly across every application on the machine, drastically reducing MFA fatigue without compromising integrity.
Demos
Theory and configuration are essential, but seeing the technology in action truly illustrates the “magic” of hardware-bound security. In this section, I’ve put together two brief demonstrations that showcase the end-user experience on both macOS and Windows.
macOS Demo – The Device-Bound SSO Experience
In this flow, the user authenticates once at the system level; from that point forward, they gain immediate, frictionless access to both native and web applications.
By removing redundant MFA prompts, we not only eliminate user friction but also ensure that every session is anchored to a verified, physical asset.”
Windows Demo: TPM-Backed Productivity
“In this demonstration, we examine the synergy between Okta Device Access and the Windows Trusted Platform Module (TPM). The flow begins at the Windows sign-in screen; as the user authenticates via Desktop MFA, a hardware-bound session is cryptographically generated in the background. We then transition to the browser, where the user achieves instant, zero-friction access to their Okta dashboard and other applications.
Early Access Feature Activation
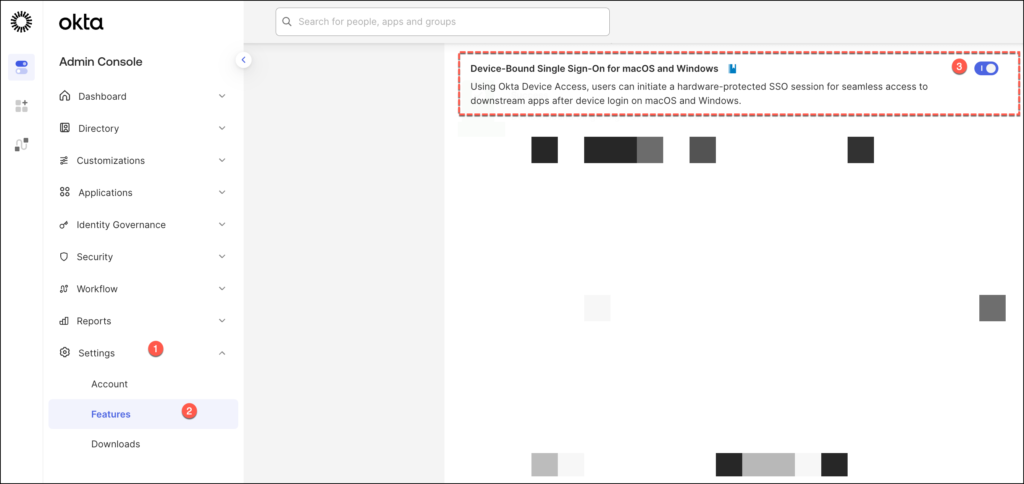
At the time of this writing, Device-Bound Single Sign-On is currently in Early Access (EA).
In the Okta Admin Console, head to Settings > Features, scroll through the list of available Early Access features to find “Device-Bound Single Sign-On for macOS and Windows” and click the status toggle to On.
Creating the DBSSO Authentication Rule
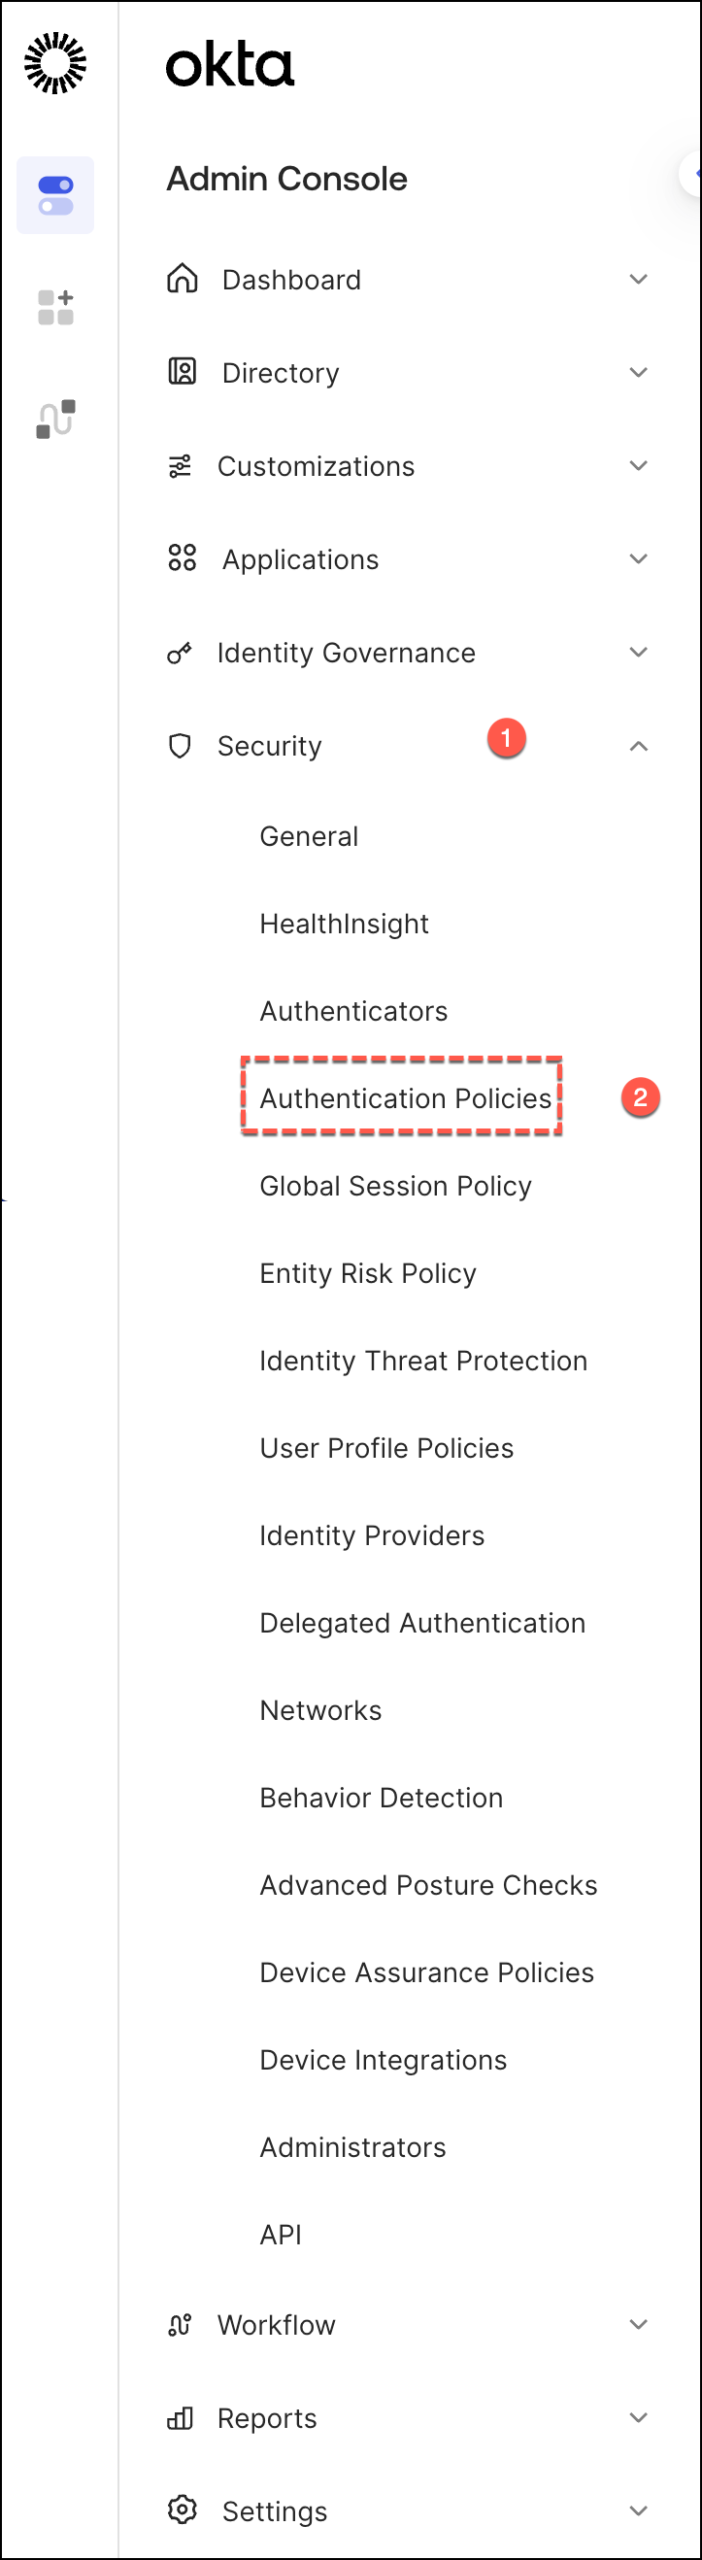
Moving into the technical setup: In your Okta Admin Console, in the Okta Admin Console, navigate to Security > Authentication Policies.
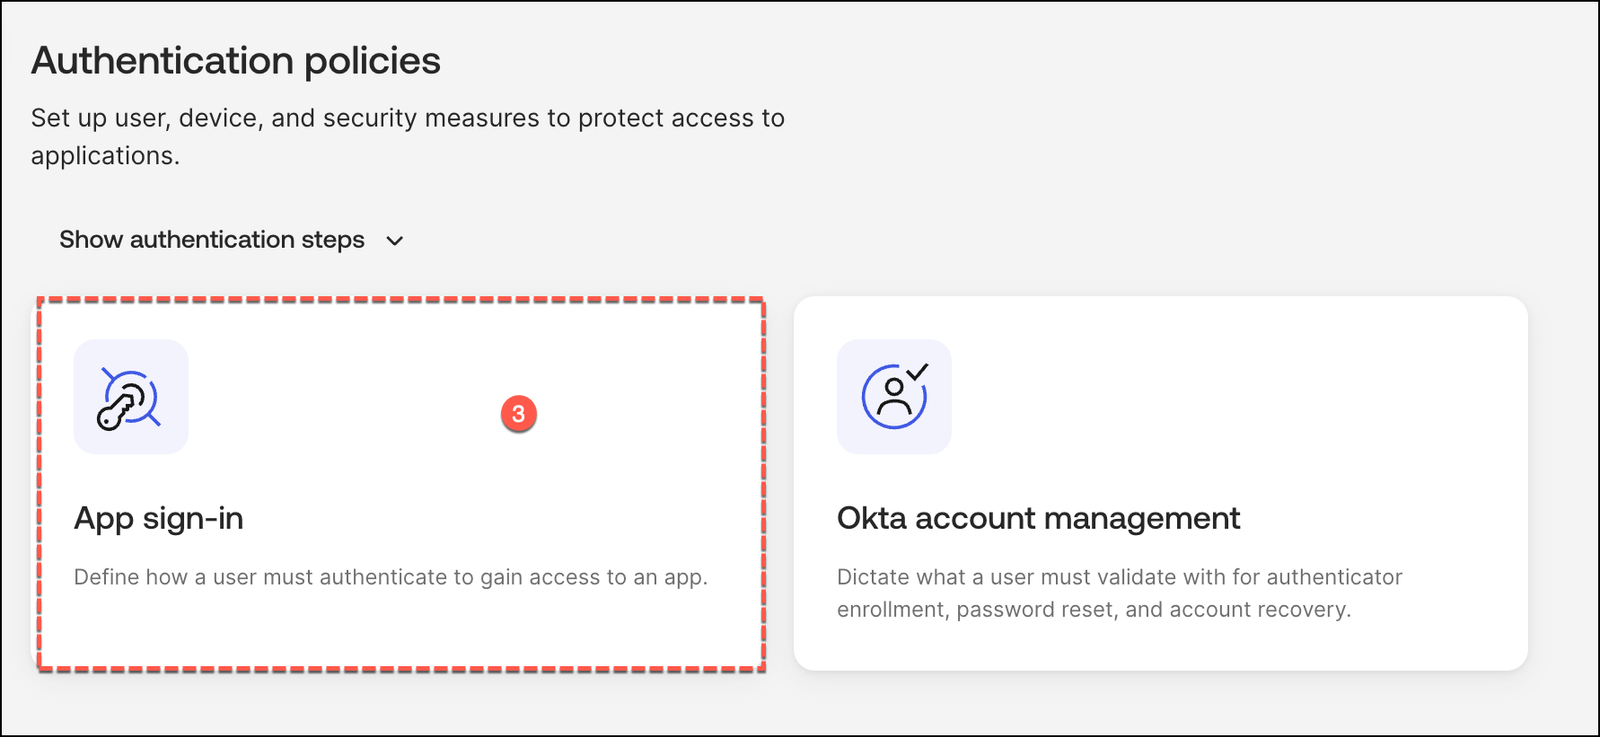
Under the Authentication Policies section, select App sign-in to manage and refine your application-level access controls.
Select the policy associated with the applications you want to protect (e.g., your “Join” or the “Default Policy”)
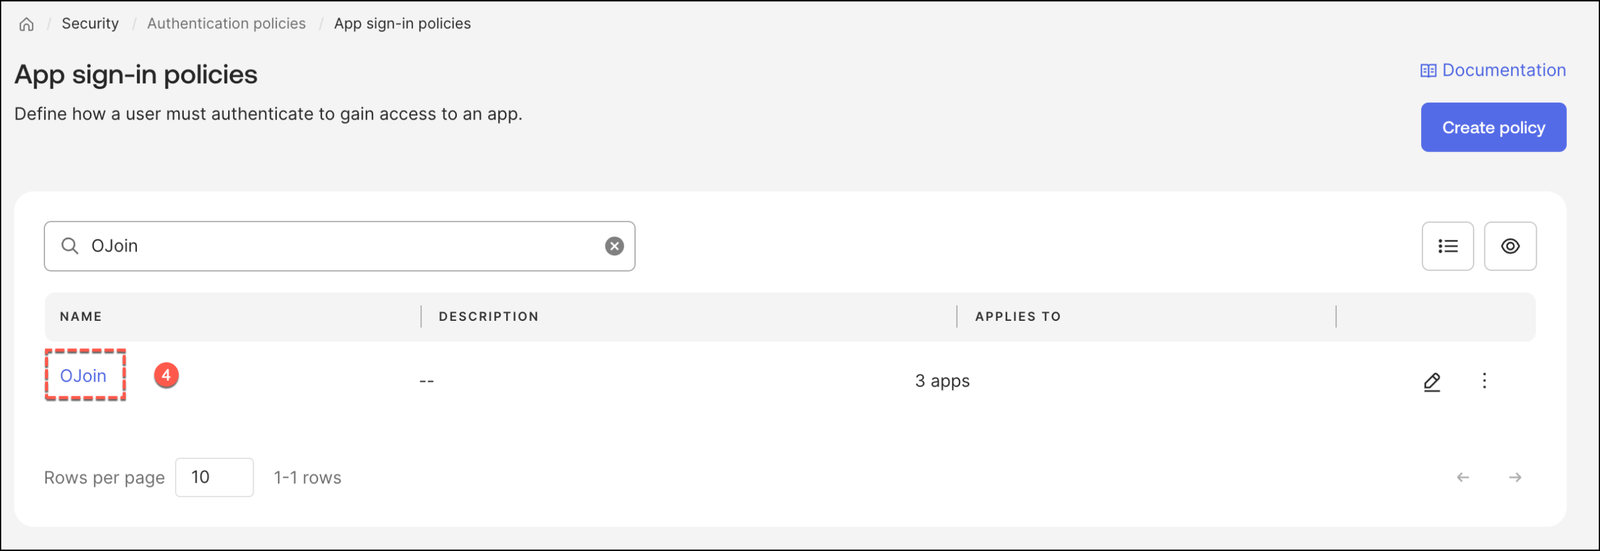
Click Add Rule to create a dedicated path for hardware-bound devices.
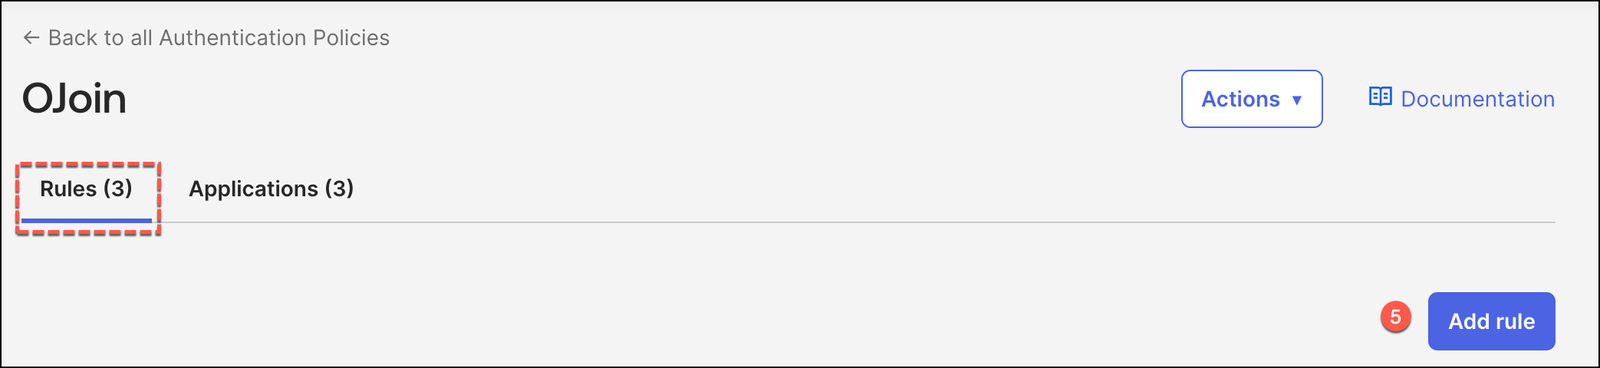
aaa
Implementing Device-Bound Single Sign-On on macOS
Transitioning to Device-Bound SSO (DBSSO) on macOS requires a specific configuration within your Mobile Device Management (MDM) suite to handle the cryptographic handshake between the hardware and Okta.
In this section, we are focusing exclusively on the specific MDM configurations required for DBSSO.
For the foundational steps—such as the general Okta Verify deployment or the initial Platform SSO setup—please refer to our comprehensive step-by-step guides at blog.iamarki.ai.
macOS Prerequisites
Before deploying Device-Bound SSO, your environment must meet specific architectural and hardware standards. To ensure a seamless rollout, verify that your fleet and Okta tenant are aligned with the following requirements.
Note: Many of these foundational configurations—such as initial Okta Verify deployment and tenant-level policies—are covered in depth in our previous guides here on blog.iamarki.ai. We recommend reviewing those posts if you are starting from a fresh tenant.
To leverage hardware-backed sessions on Apple hardware, the following criteria are mandatory:
- Operating System: Devices must be running macOS 14 Sonoma or later. This version provides the necessary Platform SSO 2.0 frameworks required for deep hardware binding.
- Hardware Security: Physical devices must be equipped with the Secure Enclave (standard on all Apple Silicon Macs and Intel-based Macs with the T2 Security Chip).
- Okta Verify Client: Ensure your fleet is running Okta Verify version 9.56 or higher. It is critical to use the version provided via the Okta Admin Console (under Settings > Downloads) rather than the public App Store version to ensure full feature compatibility.
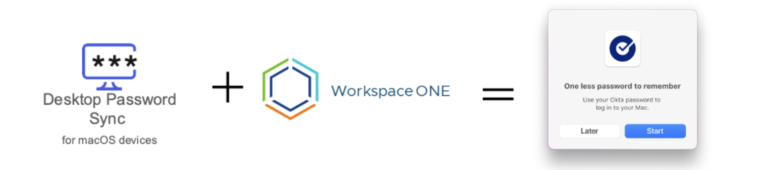
- Desktop Password Sync (DPS): You must have Desktop Password Sync for macOS already configured within your organization. This service acts as the bridge for synchronizing local account credentials with Okta.
- Managed Trust (SCEP): Devices must possess a Device Access certificate issued via the Simple Certificate Enrollment Protocol (SCEP).
- User Enrollment: All targeted users must be actively enrolled in Okta FastPass.
Implementing the Configuration in Jamf Pro
Update your Jamf Pro PSSO profile by adding the URL below to the Single Sign-On Extension payload’s URLsparameter.
https://your_okta_url/v1/auth/device-sign.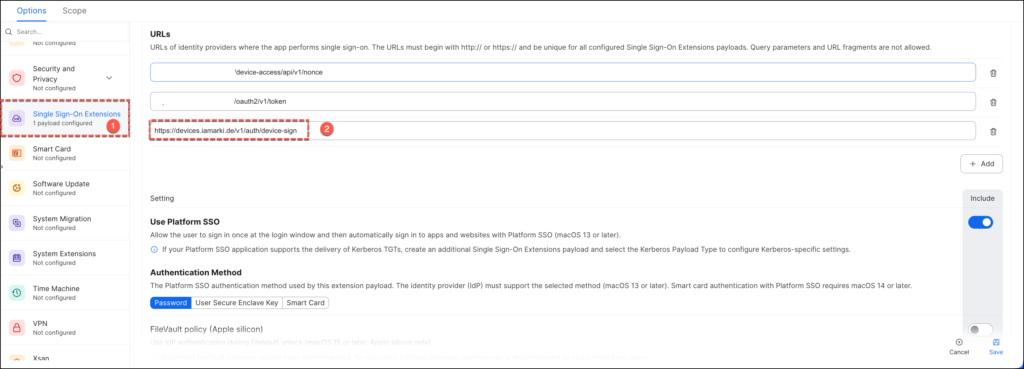
In the Application & Custom Settings area, deploy the PLIST below to configure the
com.okta.deviceaccess.servicedaemon domain.
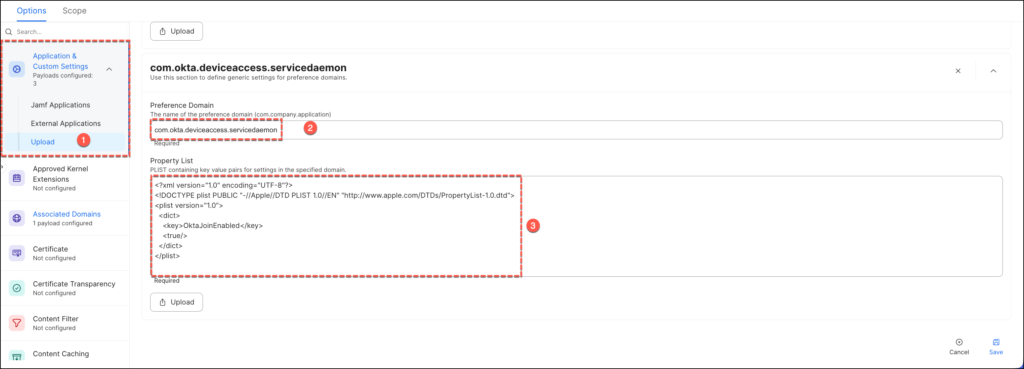
<?xml version="1.0" encoding="UTF-8"?>
<!DOCTYPE plist PUBLIC "-//Apple//DTD PLIST 1.0//EN" "http://www.apple.com/DTDs/PropertyList-1.0.dtd">
<plist version="1.0">
<dict>
    <key>OktaJoinEnabled</key>
    <true/>
</dict>
</plist>
Implementing the Configuration in Microsoft Intune
Update your Intune PSSO configuration by inserting the URL below into the URLs field of the Single Sign-On Extension payload.
https://your_okta_url/v1/auth/device-sign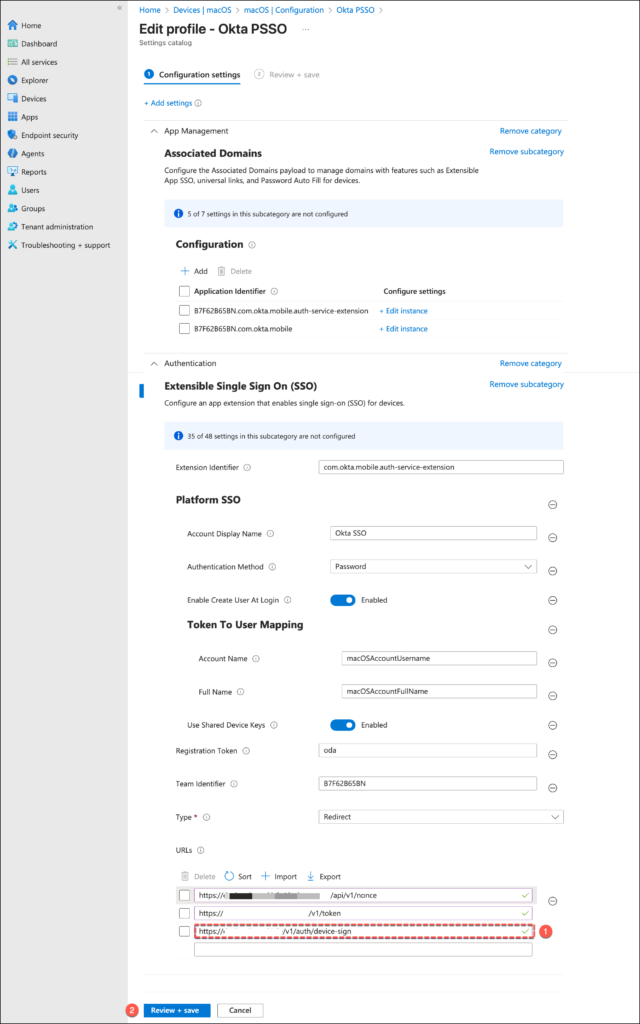
As a secondary step, we must deploy an additional Configuration Profile in Microsoft Intune to deliver the required PLIST settings to the device.
From the Configuration profiles menu, click Create > New Policy, click Create and provide a clear name.
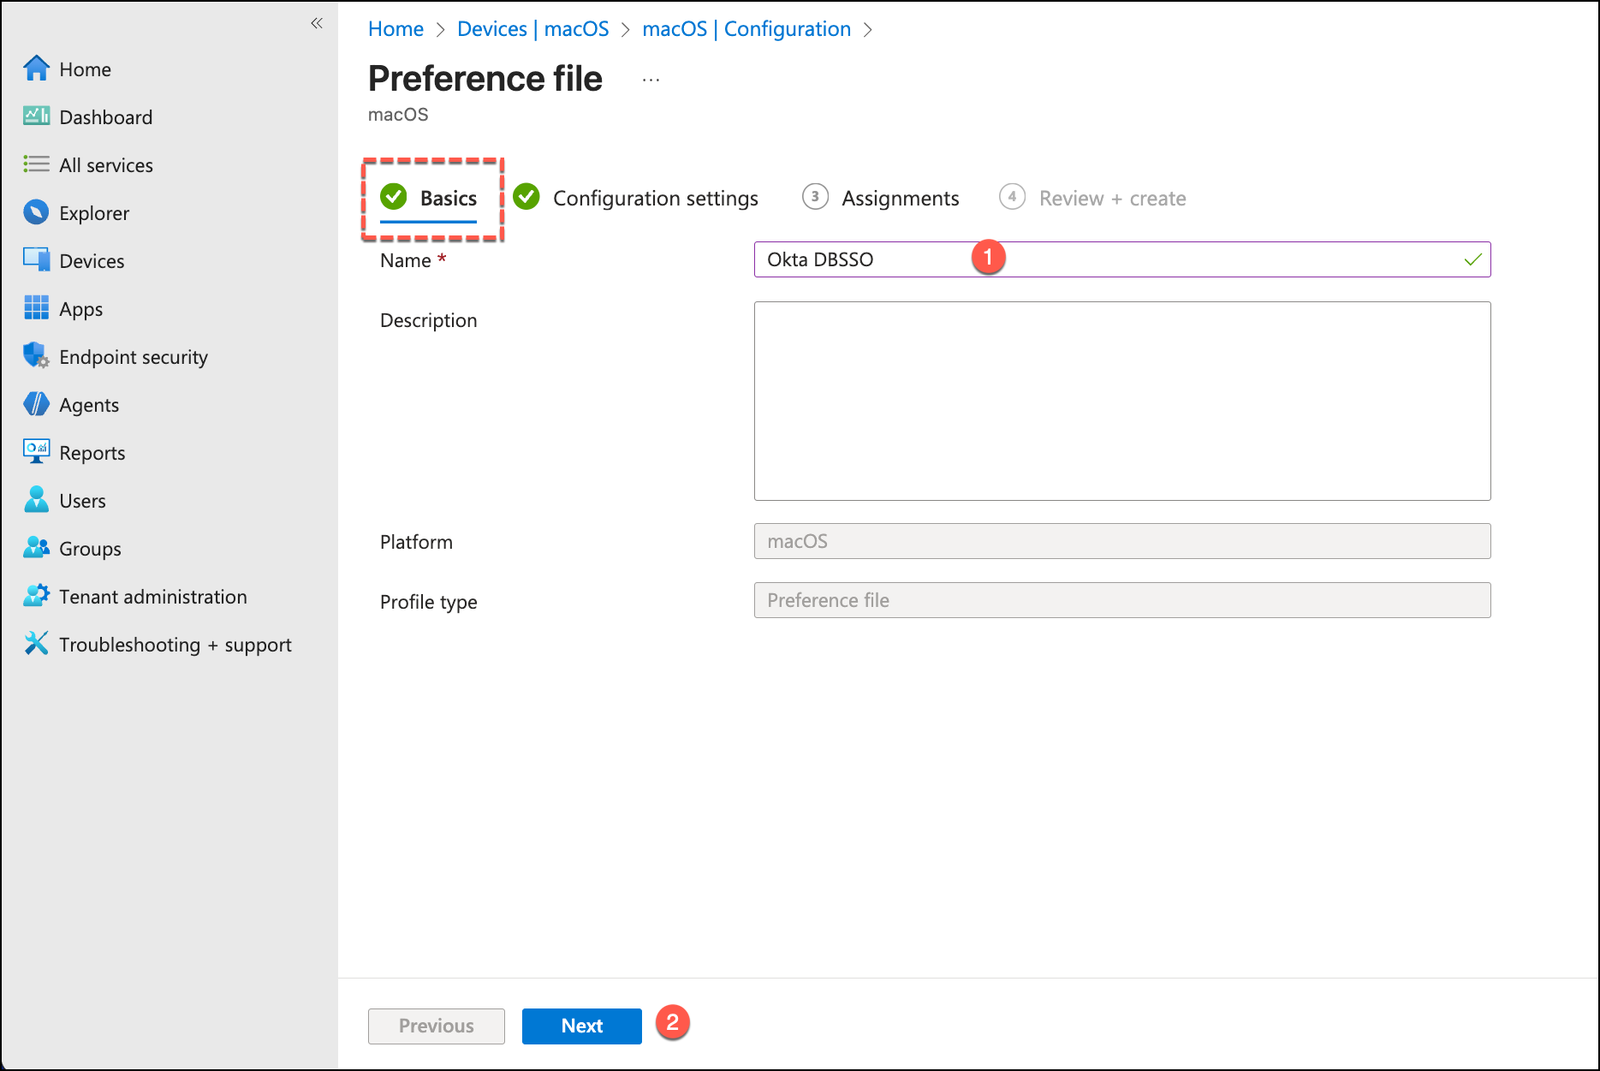
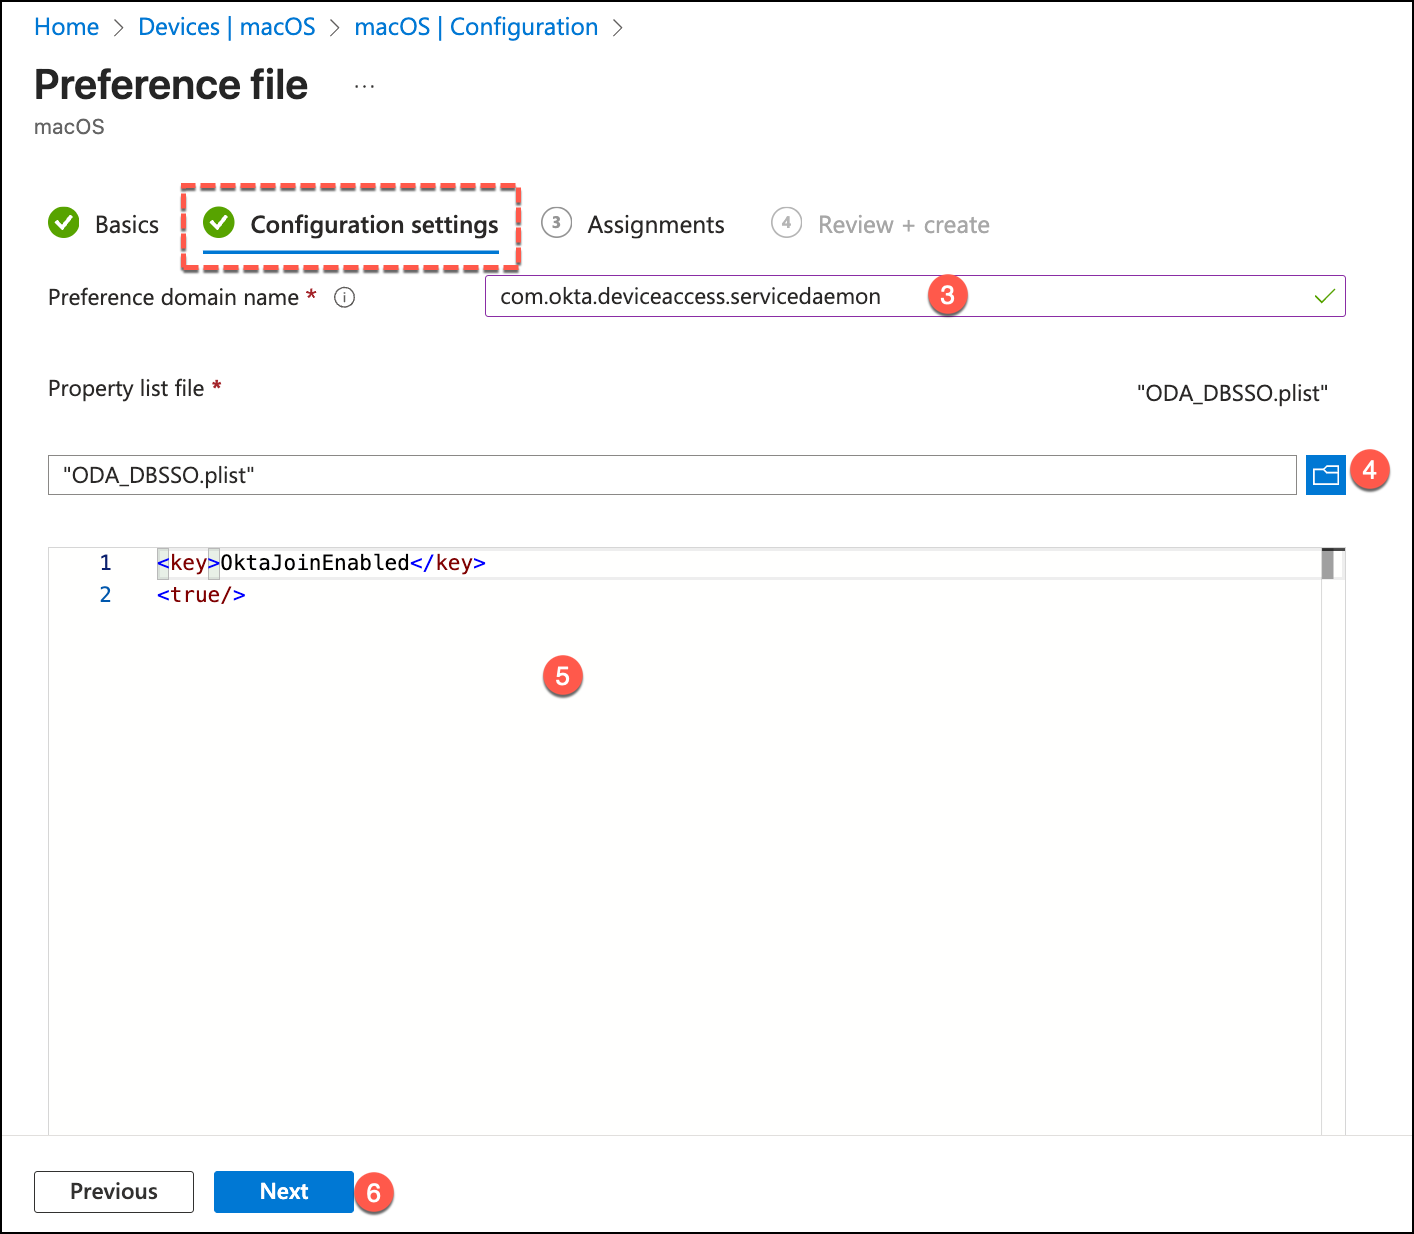
In the Configuration settings, enter the following:
- Preference domain name:
com.okta.deviceaccess.servicedaemon - Property list file: Upload your prepared
.plistor.xmlfile containing the DBSSO configuration keys.
Complete the Assignments by targeting the appropriate device groups.
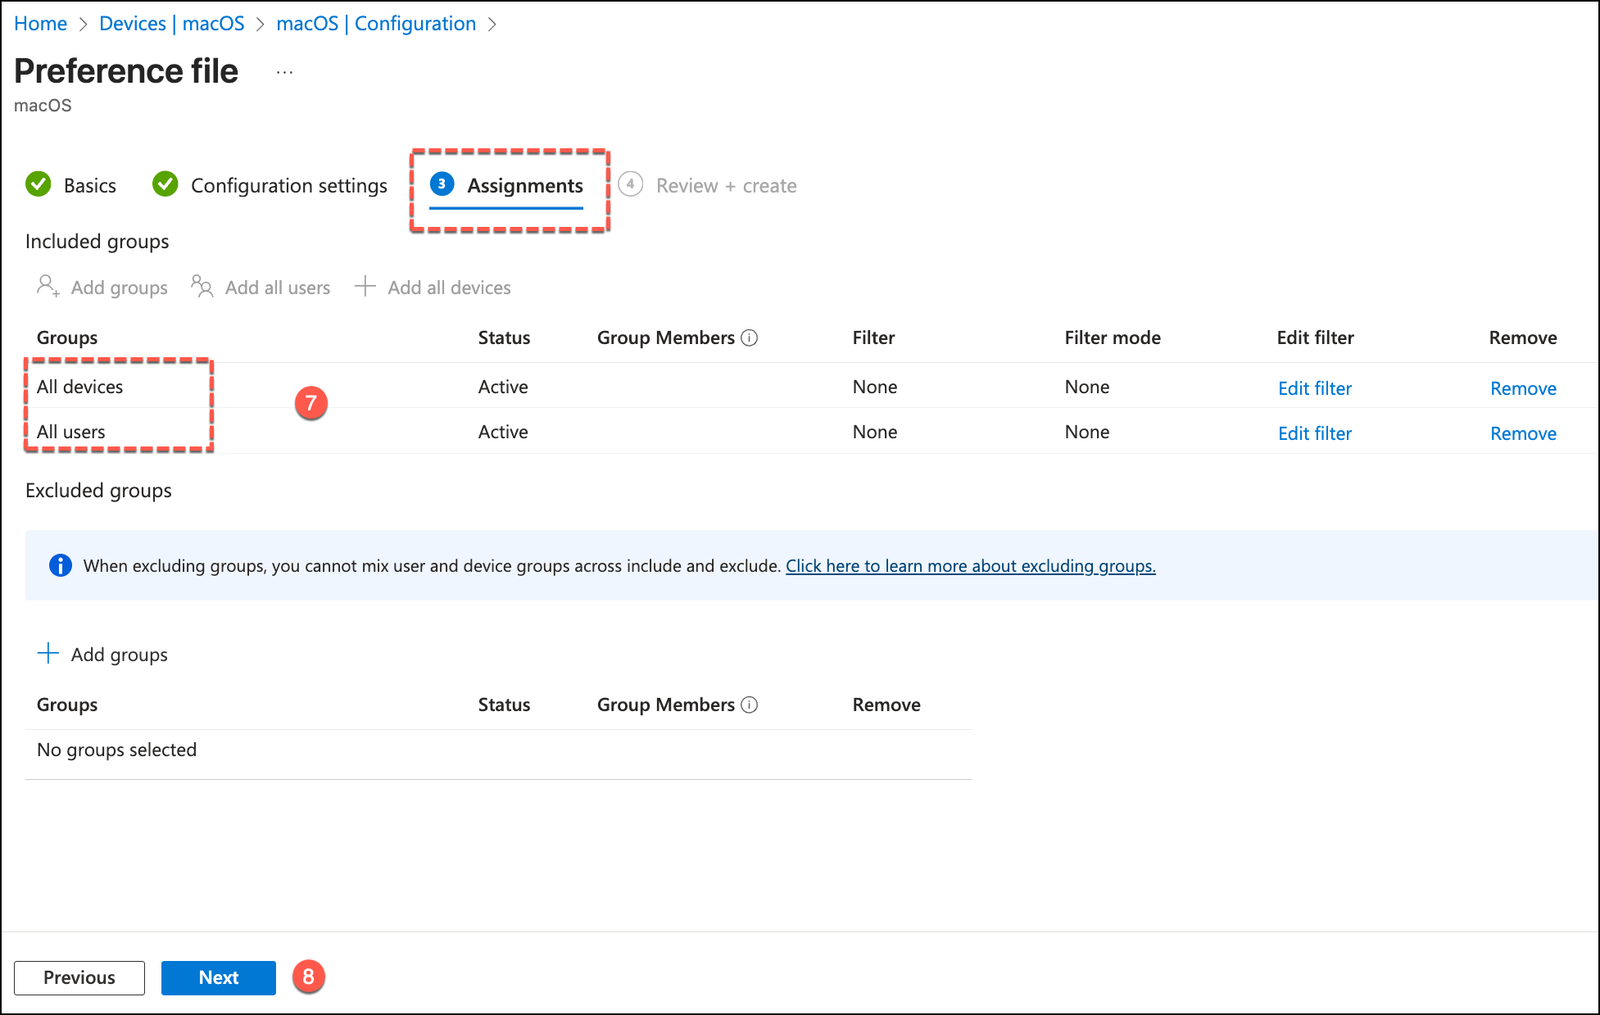
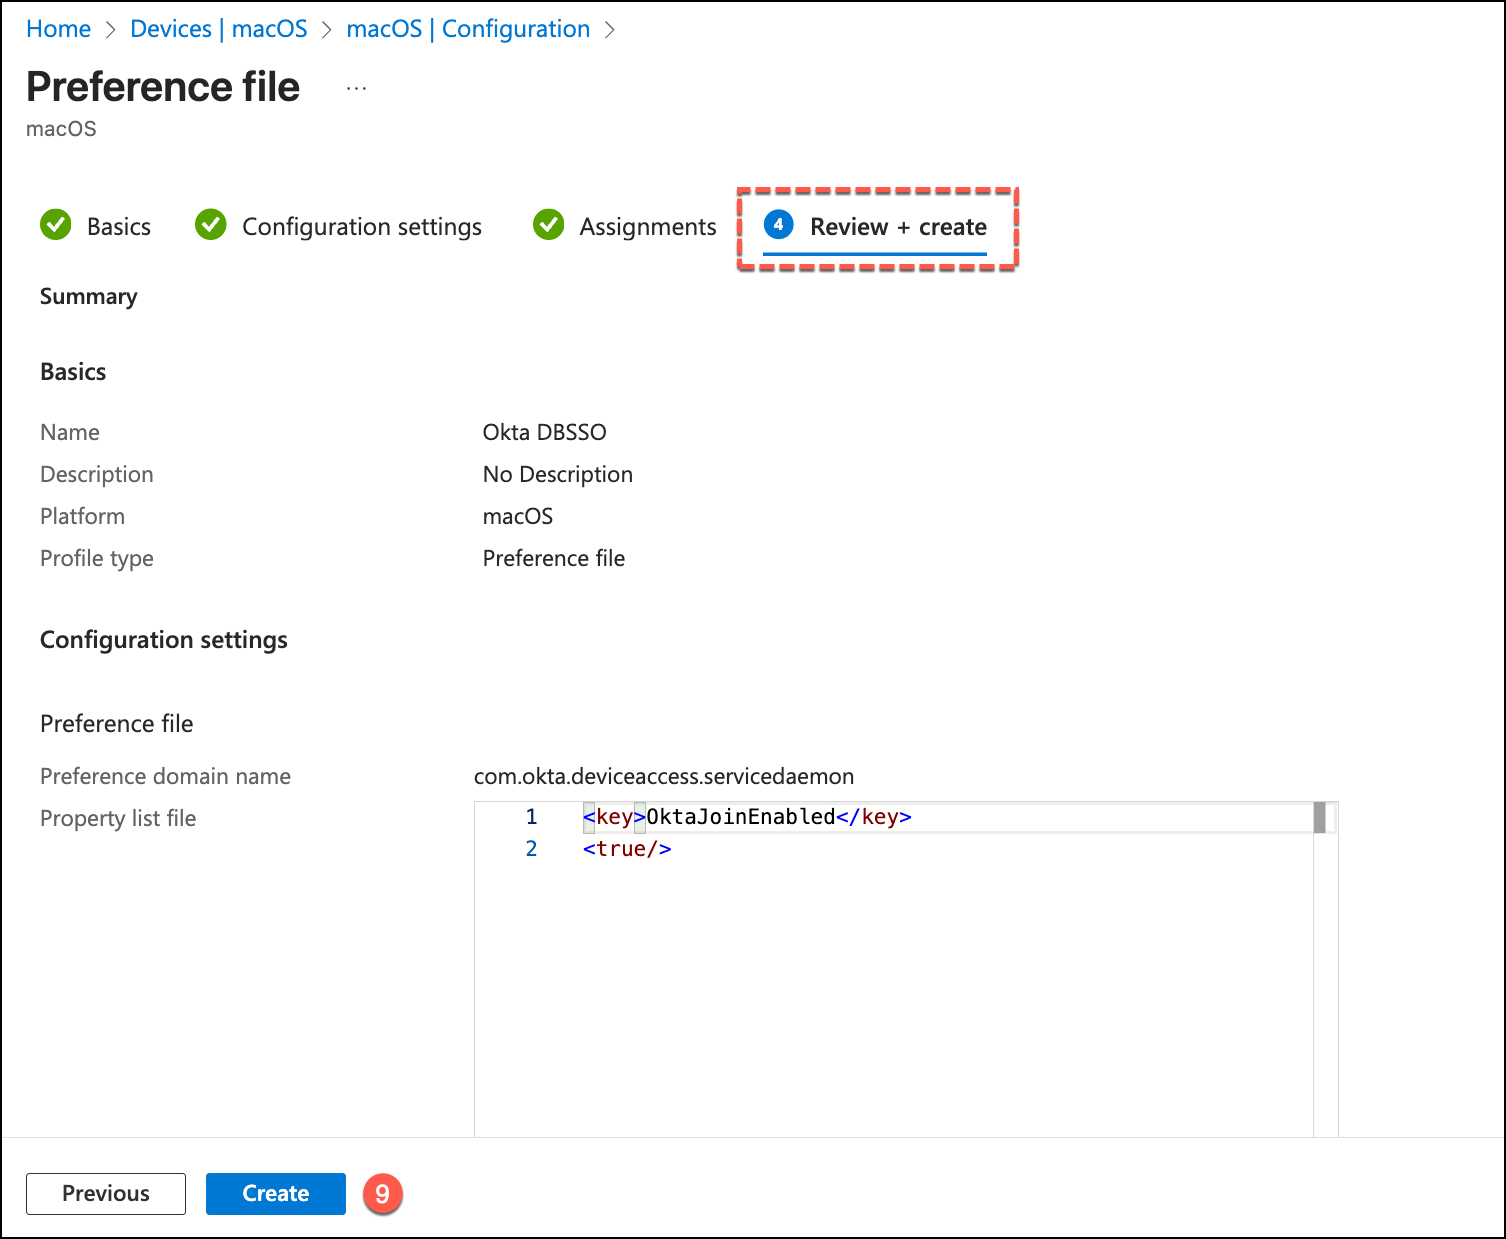
And click Create.
Implementing Device-Bound Single Sign-On on Windows
Below, we will examine the high-level implementation framework for Device-Bound SSO on Windows. This overview outlines the essential configuration path needed to leverage hardware-backed identity on your Windows fleet.
Windows Prerequisites
Implementing Device-Bound SSO on Windows requires a specific synergy between the Windows security architecture and the Okta Identity Cloud.
The Windows ecosystem relies on the Trusted Platform Module (TPM) to anchor the identity session.
Technical Context: For a comprehensive look at how to initialize your Windows fleet for the Okta ecosystem, refer to our foundational series on blog.iamarki.ai.
To achieve a successful deployment, ensure your Windows environment satisfies the following technical benchmarks:
- Operating System: Endpoints must be running Windows 10 (version 1709 or later) or Windows 11. These versions contain the modern cryptographic providers necessary for hardware-backed identity sessions.
- Hardware Root of Trust: Every device must be equipped with a Trusted Platform Module (TPM). The TPM is responsible for the secure storage and generation of the hardware-backed keys that prevent session duplication.
- Identity Management & Join State: Devices must be joined to a central directory—either Active Directory (on-premises) or Microsoft Entra ID (cloud).
- Desktop MFA (DMFA): Prior to enabling Device-Bound SSO, your organization must have Desktop MFA for Windows fully configured. This provides the secure login framework upon which the device-bound session is built.
- Okta Verify Client: Ensure that Okta Verify version 6.6.0 or later is deployed across your fleet. This version includes the specific drivers and services required to interface with the TPM for session binding.
- SCEP Deployment: A Device Access certificate must be installed on the device via the Simple Certificate Enrollment Protocol (SCEP).
- FastPass Enrollment: Users must be successfully enrolled in Okta FastPass.
Desktop MFA policies for Windows
For the Windows ecosystem, the transition to Device-Bound SSO (DBSSO) is managed primarily through the Windows Registry. By deploying specific configuration keys via your MDM—whether you are utilizing Microsoft Intune, Workspace ONE, or even Group Policy—you signal to the operating system that it should initiate the hardware-binding process.
To activate this feature, your deployment profiles must include the following registry configurations to the target endpoints
Enabling the “Okta-Joined” State
The first step is to instruct the device to participate in the hardware-anchored identity framework. This is handled by toggling the join capability within the policy subkey.
- Registry Path:
HKLM\SOFTWARE\Policies\Okta\Okta Device Access - Value Name:
OktaJoinEnabled - Type:
REG_DWORD - Value:
1
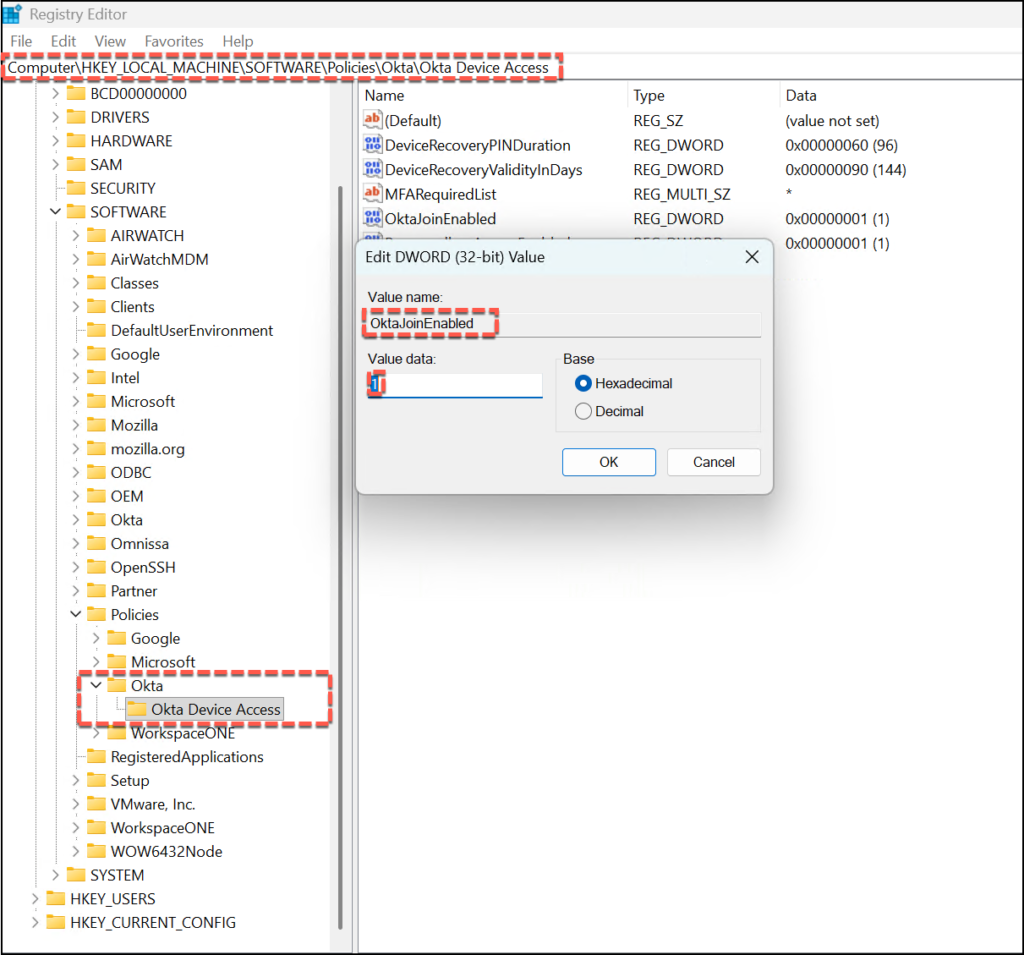
New-ItemProperty -Path "HKLM:\Software\Policies\Okta\Okta Device Access" -Name "OktaJoinEnabled" -PropertyType DWord -Value 1Activating Direct Authentication
Keep in mind that Direct Auth is a prerequisite here. It enables the device to authenticate with Okta at the Windows sign-in screen, which is necessary to successfully initialize the hardware-bound session.
- Registry Path:
HKLM\SOFTWARE\Okta\Okta Device Access - Value Name:
UseDirectAuth - Type:
REG_DWORD - Value:
1
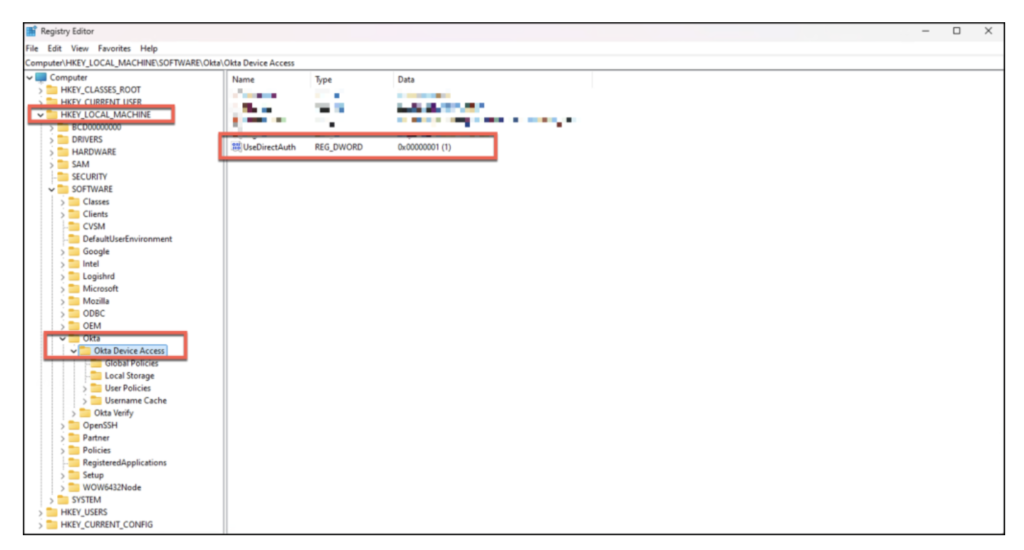
# Create Okta Device Access FIDO2 setting
New-ItemProperty -Path "HKLM:\Software\Okta\Okta Device Access" -Name 'UseDirectAuth' -PropertyType DWord -Value 1
Write-Output "Okta Device Access FIDO2 registry settings applied successfully."
Final thoughts
Transitioning to Device-Bound Single Sign-On is more than just a configuration change; it represents a fundamental shift in how we perceive identity security. By anchoring the Okta session directly to the physical hardware—whether through the Secure Enclave on a Mac or the TPM on Windows—we effectively move beyond “sharable” credentials and into the realm of true phishing resistance.
While the initial setup requires careful coordination between your Identity Provider and MDM, the payoff is twofold:
- For Admins: You gain a hardened security posture where sessions cannot be intercepted or replayed on unauthorized devices.
- For Users: You deliver a frictionless, “silent” authentication experience that stays out of the way of productivity.
As the threat landscape continues to evolve, hardware-bound identity is no longer a luxury—it is the baseline for a modern Zero Trust architecture.
I hope this guide helps you streamline your deployment. If you have any questions or want to dive deeper into specific MDM edge cases, feel free to reach out!