Step-by-Step: Deploying Platform SSO with Secure Enclave Support
May 2026: This is an Early Access release
Introduction
Apple’s Platform Single Sign-On (Platform SSO) framework fundamentally changes how identity works on macOS. For a while, the primary focus across the industry has been on password synchronization—mapping a cloud identity provider’s credentials directly to the local macOS login window.
While syncing passwords provides a massive usability lift over legacy binding workflows, the framework is capable of much more.
By leveraging Platform SSO with hardware-bound keys, organizations can transition from basic credential syncing to true hardware-backed authentication anchored natively within Apple’s Secure Enclave.
Requirements
Before deploying this configuration profile to your fleet, you need to ensure your environment meets a few baseline requirements. Because this workflow relies on specific background communication between your identity provider, your management tools, and native hardware security layers, verifying these prerequisites first will prevent deployment failures down the line.
The following sections break down the necessary platform, management, and endpoint specifications required for a successful rollout:
Okta Requirements
The following Okta features and configurations are necessary:
- Okta Identity Engine (OIE): Your Okta organization must be on the Okta Identity Engine platform.
- Okta Device Access: The Okta Device Access product must be enabled and configured for your organization.
- You must have a configured the Platform Single Sign-On for macOS application integration within the Okta Admin Console.
If you need to set up this integration first, refer to our comprehensive walkthrough on How to Configure and Deploy the Okta PSSO Application - Certificate Authority (CA): Okta must be configured as a Certificate Authority for Device Access to provision the necessary Simple Certificate Enrollment Protocol (SCEP) certificates to the macOS devices.
If you haven’t set up your CA yet, follow our step-by-step guide on How to Configure Okta Device Access Certificates Across Different MDMs
before proceeding. - Okta Verify Application:
- The latest, MDM-deployable version of Okta Verify must be downloaded from the Okta Admin Console (do not use the Apple App Store version).
- Secure Enclave Authentication for Platform SSO:
Enable the Early Access feature.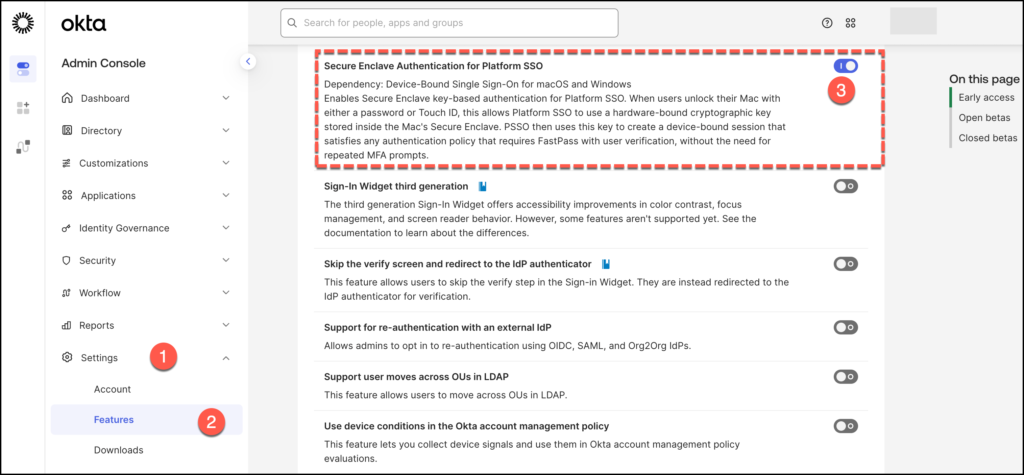
- Network Access: macOS devices must be able to communicate with the necessary Okta endpoints during the Setup Assistant phase.
MDM & Profile Requirements
To successfully orchestrate this deployment, your Mobile Device Management (MDM) framework must handle the delivery of application packages and configuration payloads. Because Platform SSO relies entirely on native macOS frameworks, your MDM solution must be capable of scoping custom configuration profile payloads to your managed endpoints.
- MDM Capabilities: Your MDM solution must support standard Apple Platform SSO payload configurations and custom configuration profile deployments.
- Managed App Delivery: The Okta Verify application package must be deployed and installed by your MDM onto the target Mac devices to enable the local device agent to communicate with your Okta tenant.
Required Configuration Profiles
To facilitate secure identity routing and automated machine certificate issuance, a specific trifecta of configuration payloads must be scoped and deployed to your managed endpoints:
| Payload Type | Core Purpose & Key Settings |
| SCEP Configuration Profile | Facilitates automatic machine certificate deployment. Must point to your unique Okta Device Access SCEP endpoints (including the target SCEP URL, Challenge URL, and administrative credentials). |
| Single Sign-On Extensions | Configures and registers the Okta Verify SSO extension on the device. Must include the exact Extension Identifier, Apple Team Identifier, relevant Okta URLs, and the critical PlatformSSO key set to 2.0 to unlock full Platform SSO capabilities. |
| Associated Domains Payload | Establishes the cryptographic trust boundary between macOS and the identity provider. Must be included in your profile scope to explicitly declare and bind your organization’s specific Okta domain. |
Seeing is Believing: Okta Device Access in Action
Now that we have established the architectural baseline and confirmed our pre-requisites, let’s look at how this technology operates in the wild. Before we dive deeper into the underlying mechanics, we want to show you exactly what the end-user and administrator experience looks like.
We have broken the live demonstration down into three distinct, progressive scenarios that highlight how frictionlessly you can achieve a hardware-bound, phishing-resistant security posture.
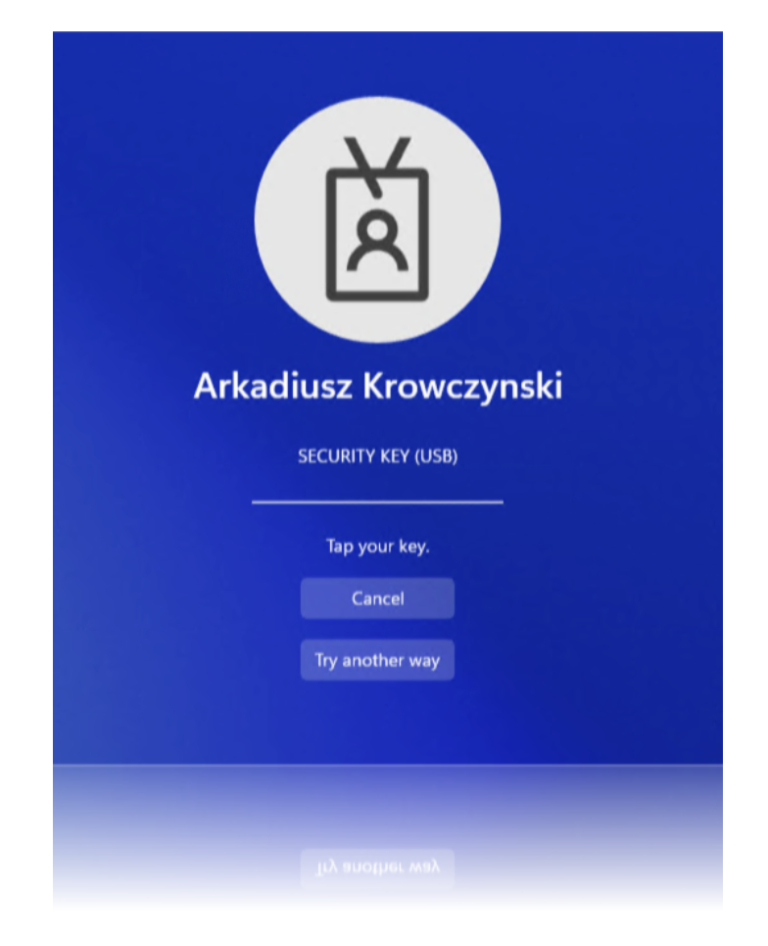
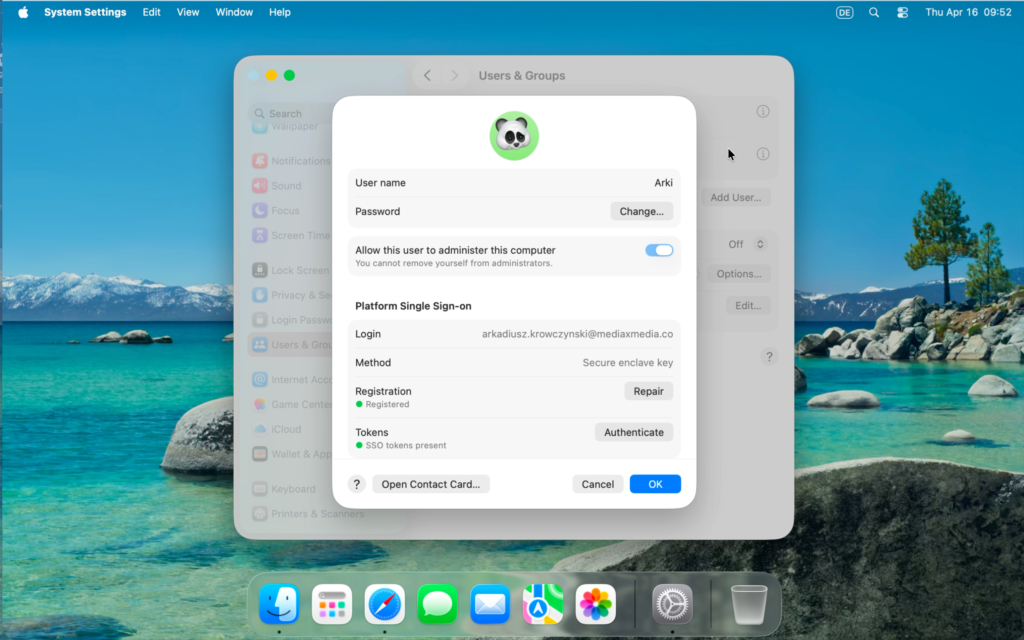
Demo – Manual Secure Enclave Registration for Already Enrolled Devices
For Macs that are already out in the field and fully managed, user intervention is required to complete the Secure Enclave enrollment. This demo covers the exact steps an existing user must take within macOS System Settings to manually register and secure their account with Okta Platform SSO.
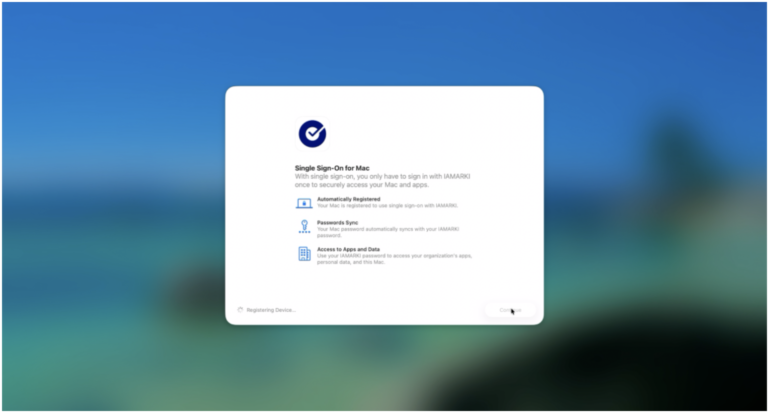
Demo – Simplified Setup for Platform SSO with Secure Enclave
This walkthrough illustrates the zero-touch onboarding experience during initial device deployment using Apple’s native Out-of-Box Experience (OOBE). It demonstrates how the automated handshake between your MDM enrollment profile and the Okta Identity Cloud seamlessly provisions a hardware-bound Secure Enclave key before the user even reaches the desktop.
For a comprehensive operational breakdown and real-world look at how this zero-touch framework radically simplifies the classic, multi-step Mac onboarding experience, check out the community guide: Farewell Complexity: Platform SSO Simplified Setup on macOS Powered by Okta and Jamf. It provides an excellent look at how these exact payload architectures translate into a friction-free end-user workflow.
Seamless Migration – From Password Sync to Secure Enclave Platform SSO
In this demo, we are focusing entirely on the end-user journey during a security upgrade. We will look at what happens when an organization transitions from Okta Device Access PSSO Password Sync to hardware-bound Secure Enclave Platform SSO.
MDM Deployment Strategy
Because Apple’s Platform SSO framework is baked directly into macOS, deploying it at scale requires a cohesive MDM profile orchestration strategy.
Organizations must translate the generic profile prerequisites into specific payloads within their chosen device management tool.
💡 Over time, this section will expand to cover step-by-step guides for various enterprise MDM platforms.
We are kicking off this deployment series with our first verified platform: Jamf Pro.
Vendor Guide: Configuring Payloads in Jamf Pro
To deploy Platform Secure Enclave with Okta Device Access via Jamf Pro, you must configure a dedicated Computer Configuration Profile.
Follow these specific payload paths to align your Jamf configuration with Okta’s backend.
Jamf Configuration Profile
First things first: let’s jump into your Jamf Pro administrative console and lay down the foundation for our new policy.
- From the sidebar, head over to Configuration Profiles.
- Look for the top-right corner and click that + New button.
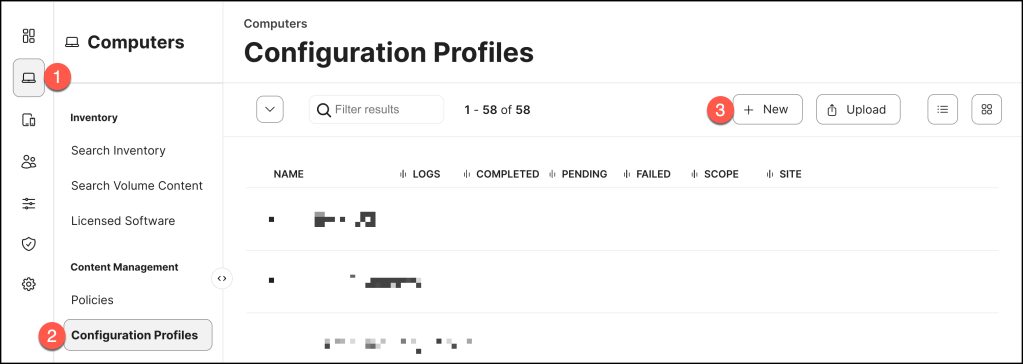
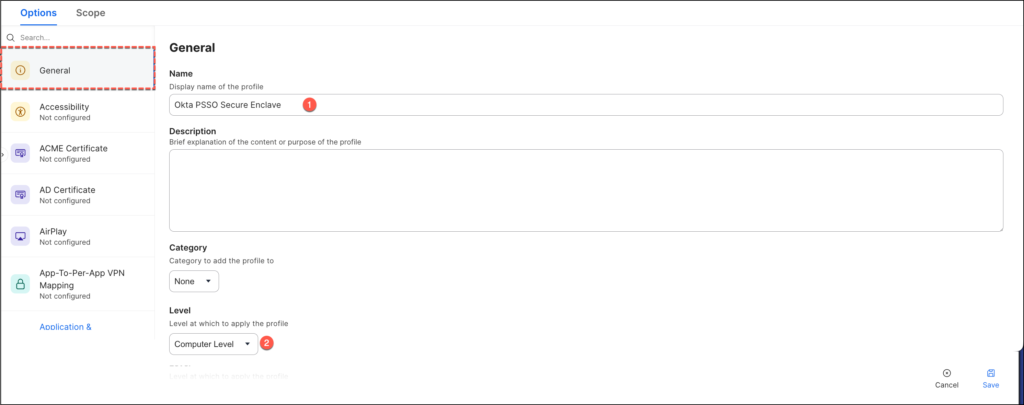
You will land directly on the General payload tab. In the Name field, drop in a clear, descriptive title like Okta PSSO Secure Enclave.
This keeps your policy inventory clean and easy for other admins to identify at a glance.
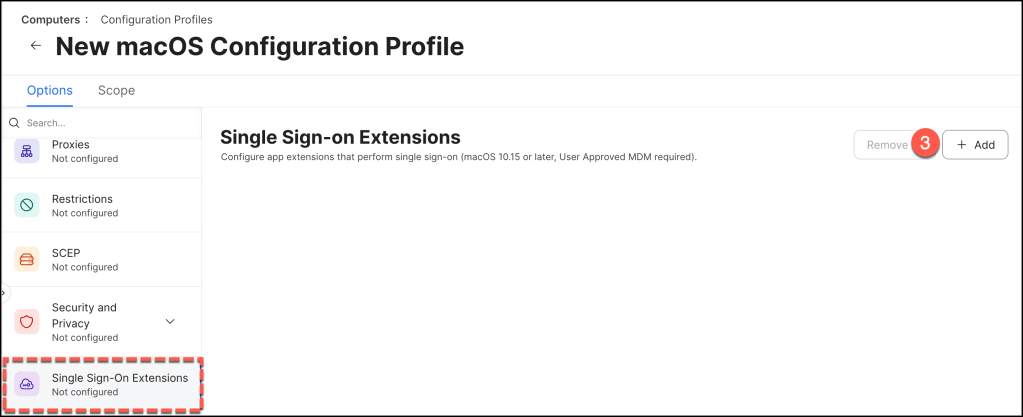
Scroll down the payload list on the left, select Single Sign-On Extensions, and click the + Add button.
This opens up the core configuration screen where we will link macOS directly to Okta.
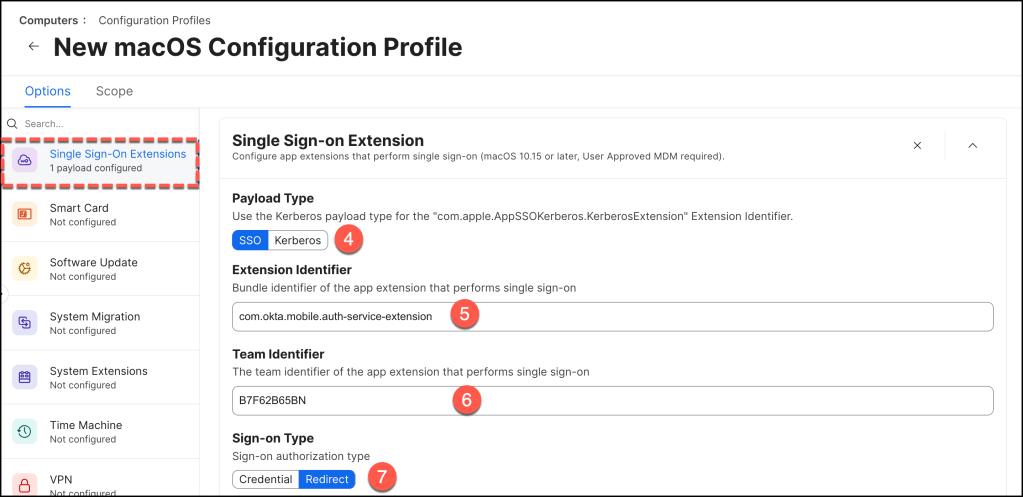
Now, populate the primary fields with the exact Apple and Okta parameters below. These parameters tell macOS precisely which native background service needs to handle the authentication requests:
- Payload type: SSO
- Extension identifier: com.okta.mobile.auth-service-extension
- Team identifier: B7F62B65BN
- Sign-on type: Redirect
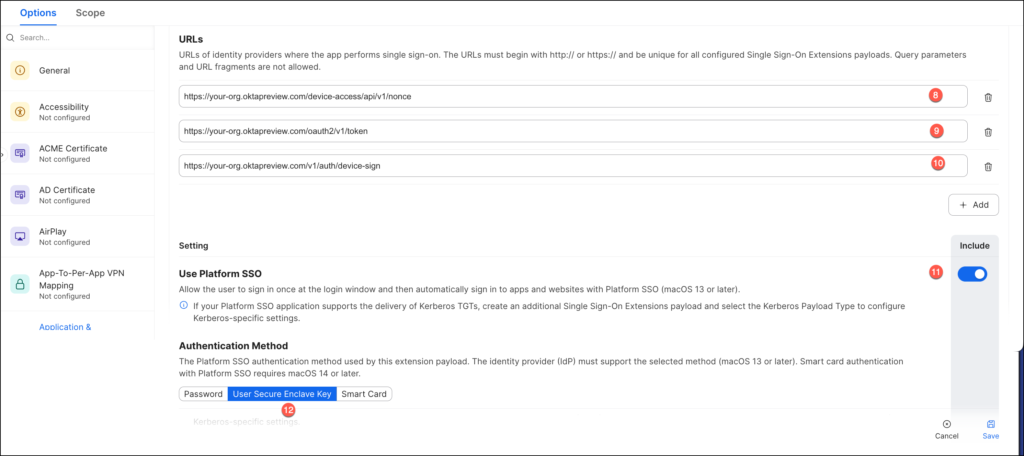
Staying within that same Single Sign-On Extensions payload, scroll down to the URLs section. Here, we need to declare the specific Okta endpoints that macOS will talk to for secure token exchanges and cryptographic handshakes.
Add these three distinct URLs, making sure to replace <<your-org>> with your actual Okta tenant name:
- https://<<your-org>>[.oktapreview.com/device-access/api/v1/nonce]
- https://<<your-org>>[.oktapreview.com/oauth2/v1/token]
- https://<<your-org>>[.oktapreview.com/v1/auth/device-sign]
⚠️ Note: If you are building this out in a production environment rather than a sandbox, remember to swap out
.oktapreview.comwith your standard production.okta.comdomain.
Right below your URLs, you will find the native toggles that activate Apple’s underlying Platform SSO framework.
Set them as follows to establish your baseline authentication behavior:
- Use Platform SSO Enabled
- Authentication Method Use Secure Enclave Key
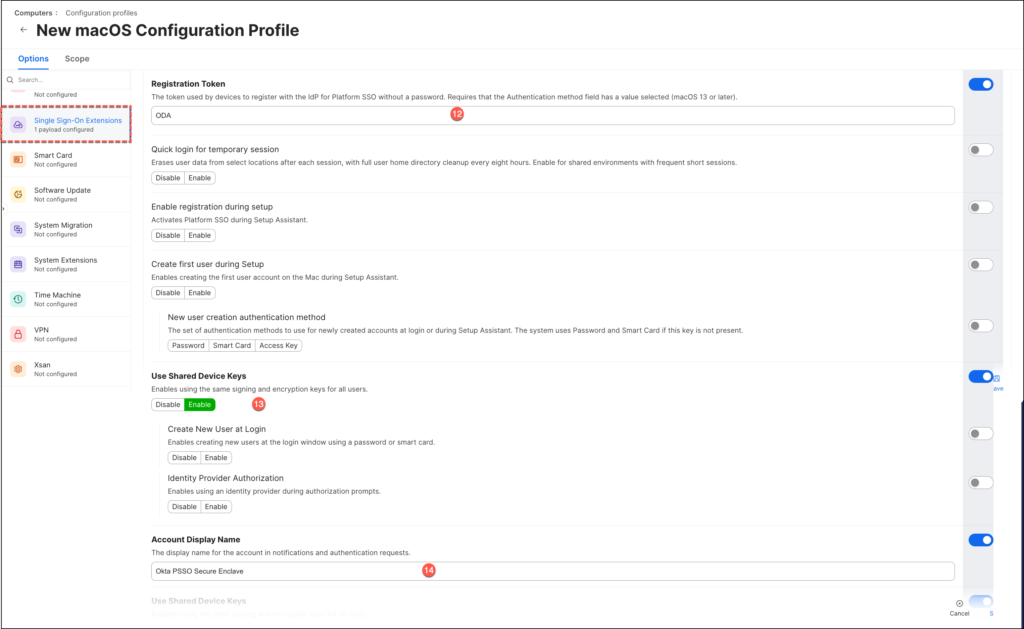
Continue scrolling down the Single Sign-On Extensions payload to configure the settings that activate the zero-touch enrollment and dynamic user creation functionalities.
- Registration Token should be set to a random value as field isn’t used, as the SCEP certificate is used in place of the Registration Token, but must be populated.
- Enable Use Shared Device Keys
- Account Display Name: Enter your preferred name.
With the SSO extension configured, let’s establish the cryptographic trust boundary between macOS and Okta.
Scroll back up the payload list on the left sidebar, select Associated Domains, and click Configure.

Click + Add.
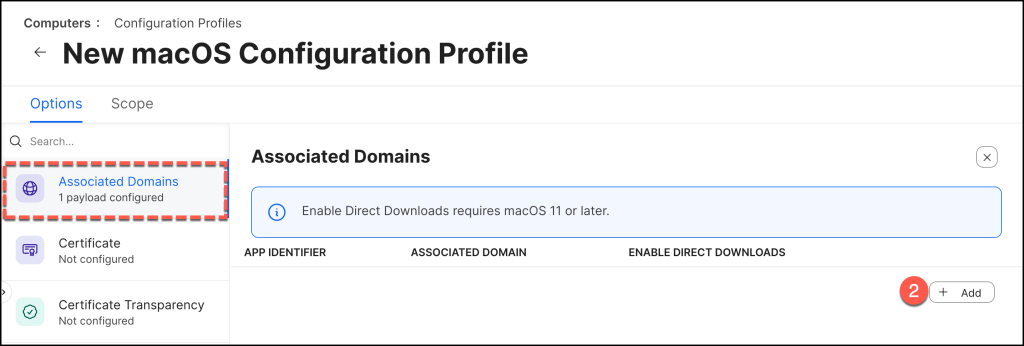
Think of the Associated Domains payload as the ultimate cryptographic trust boundary. It tells the macOS operating system that only the official, signed Okta Verify app binaries are allowed to securely pass credentials and talk to your specific Okta organization.
Create two entries in the list, mapping both of Okta’s core app identifiers to your tenant.
🔑 Crucial Rule: Your domain entry must be prefixed with authsrv:
Configure your rows to look exactly like this (remembering to swap out <<your-org>> with your tenant name):
| App Identifier | Associated Domain |
|---|---|
B7F62B65BN.com.okta.mobile | authsrv:<<your-org>>.oktapreview.com |
B7F62B65BN.com.okta.mobile.auth-service-extension | authsrv:<<your-org>>.oktapreview.com |
(Again, if you are working in production instead of a sandbox, swap out .oktapreview.com for your standard .okta.com domain.)

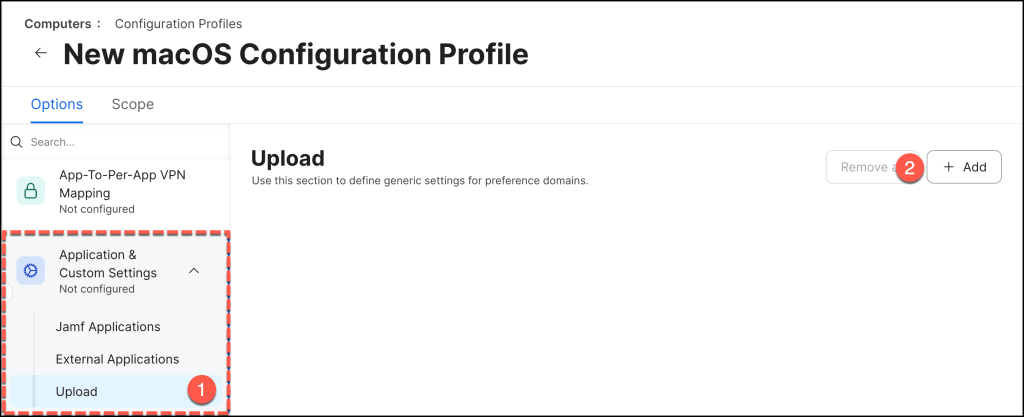
To handle the more advanced settings that don’t have a dedicated checkbox in Jamf yet, we need to upload a custom plist configuration.
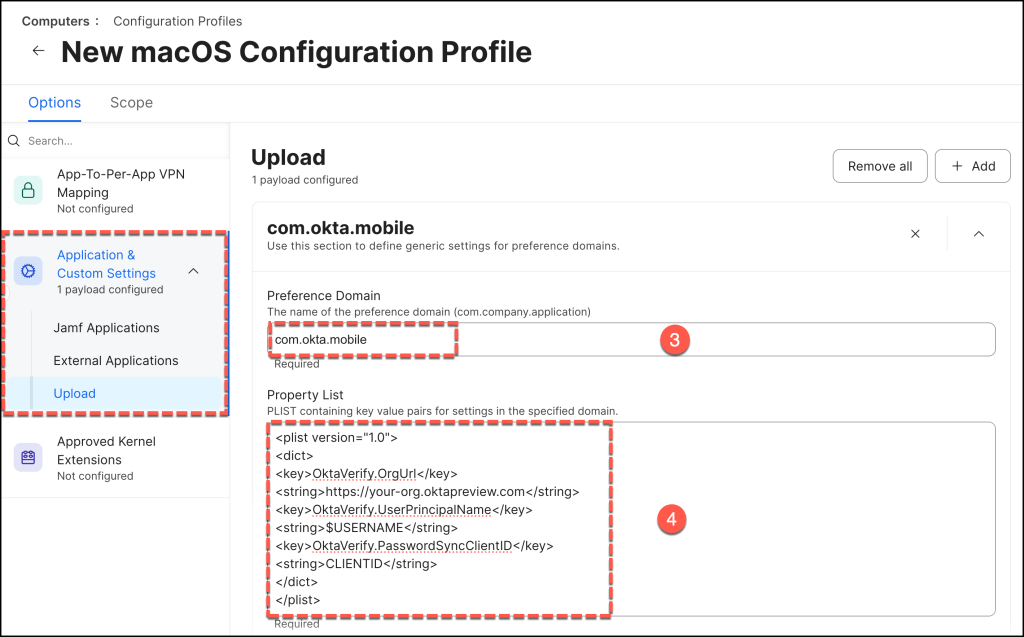
Scroll down the payload menu on the left and click on Applications & Custom Settings, from the sub-menu that appears, select the Upload option.
Click that + Add button on the right to spin up a fresh custom payload slot.
In the Preference Domain field, type in exactly: com.okta.mobile
Head down to the configuration area box and paste in the following XML plist snippet to finalize the custom properties:
<plist version="1.0">
<dict>
<key>OktaVerify.OrgUrl</key>
<string>https://your-org.oktapreview.com</string>
<key>OktaVerify.UserPrincipalName</key>
<string>$USERNAME</string>
<key>OktaVerify.PasswordSyncClientID</key>
<string>CLIENTID</string>
</dict>
</plist>
Before deployment, two critical placeholder values within the configuration payload must be updated to align with your specific Okta tenant settings.
Okta Client ID: Substitute CLIENTID with the unique Client ID obtained from the Authentication tab of the Platform Single Sign-On for macOS or Desktop Password Sync application within your Okta Tenant.
Okta Organization URL: Replace the placeholder https://your-org.oktapreview.com with your production Okta organization URL.
The OktaVerify.UserPrincipalName key offers an optional, but highly recommended, mechanism to enhance the user experience by pre-populating the username field in the Okta Sign-In Widget.
- Parameter: OktaVerify.UserPrincipalName
- Value: An environment variable such as
$USERNAME(if supported by your MDM) or a static identifier.
Specifying this value eliminates the need for the user to manually input their Okta username during the registration process, smoothing the onboarding flow.
If this key is omitted, users will be required to type their full username when prompted to sign in for the first time.
To complete the underlying configuration, we need to create a secondary payload block,
cllick the + Add button inside the Applications & Custom Settings area once more to initialize your second preference domain entry.

In the new Preference Domain field, type in exactly: com.okta.mobile.auth-service-extension.
Head down to the text area and paste in the following XML snippet to link the extension to your Okta organization domain:
<plist version="1.0">
<dict>
<key>OktaVerify.OrgUrl</key>
<string>https://your-org.oktapreview.com</string>
<key>OktaVerify.UserPrincipalName</key>
<string>$USERNAME</string>
<key>OktaVerify.PasswordSyncClientID</key>
<string>CLIENTID</string>
<key>PlatformSSO.ProtocolVersion</key>
<string>2.0</string>
</dict>
</plist>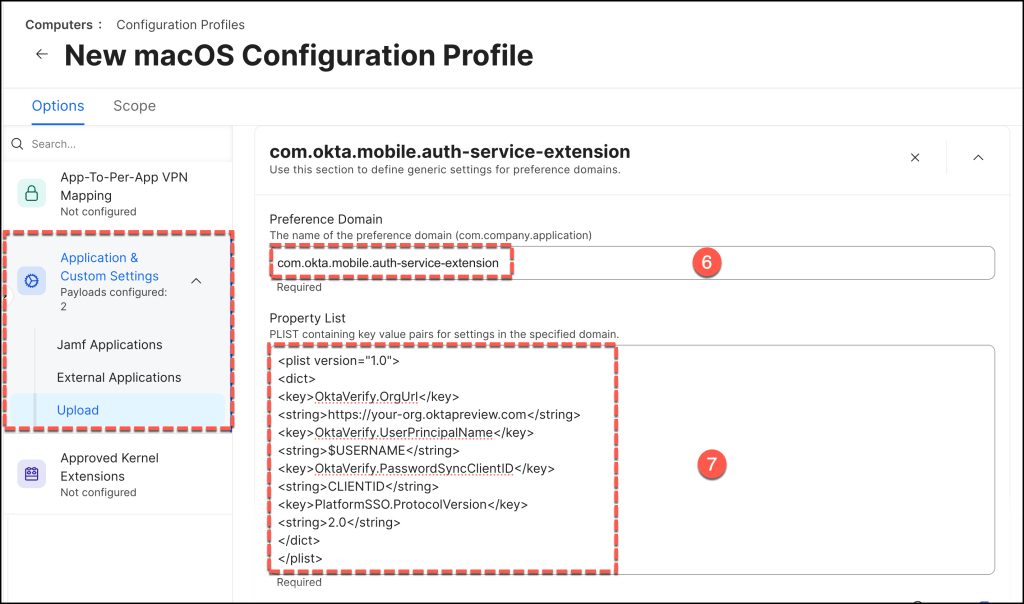
For this third payload block, In the new Preference Domain field, type in exactly: com.okta.deviceaccess.servicedaemon.
Head down to the text area and paste in the following XML snippet
<?xml version="1.0" encoding="UTF-8"?>
<!DOCTYPE plist PUBLIC "-//Apple//DTD PLIST 1.0//EN" "http://www.apple.com/DTDs/PropertyList-1.0.dtd">
<plist version="1.0">
  <dict>
    <key>OktaJoinEnabled</key>
    <true/>
  </dict>
</plist>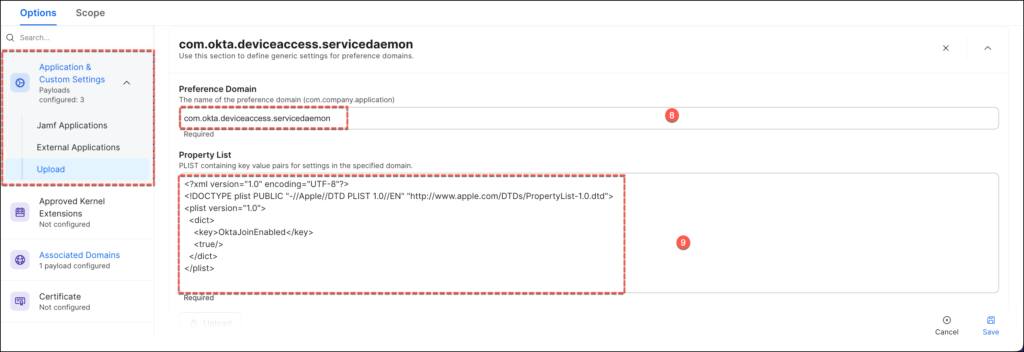
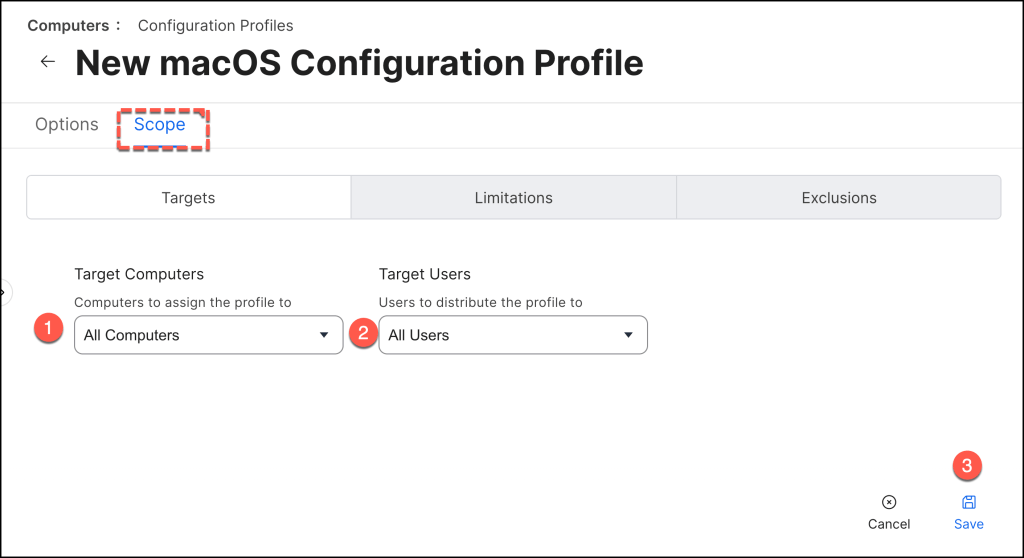
With our payloads, domains, and custom variables locked and loaded, the final piece of the puzzle is deciding exactly which devices in your fleet should receive this configuration.
Scroll back up to the top navigation bar of the configuration profile window and click on the Scope tab.
Locate the Selected Deployment Targets section.
Conclusion
Implementing Platform SSO with Secure Enclave support is more than a configuration upgrade—it is a fundamental architectural shift. In a modern threat landscape, traditional credentials are the single largest point of failure. By moving away from legacy password synchronization and anchoring identity directly into physical Apple silicon, you are effectively neutralizing broad categories of credential-based attacks, including adversary-in-the-middle (AiTM) phishing.
From a strategic perspective, this deployment aligns perfectly with the core pillars of a true Zero Trust roadmap:
- Cryptographic Device Identity: Trust is no longer based on what a user knows (a password that can be stolen), but on what a verified user possesses (a hardware-bound key that cannot leave the chip).
- Continuous, High-Assurance Context: Unlocking the device natively satisfies strong authentication requirements, allowing the endpoint itself to act a